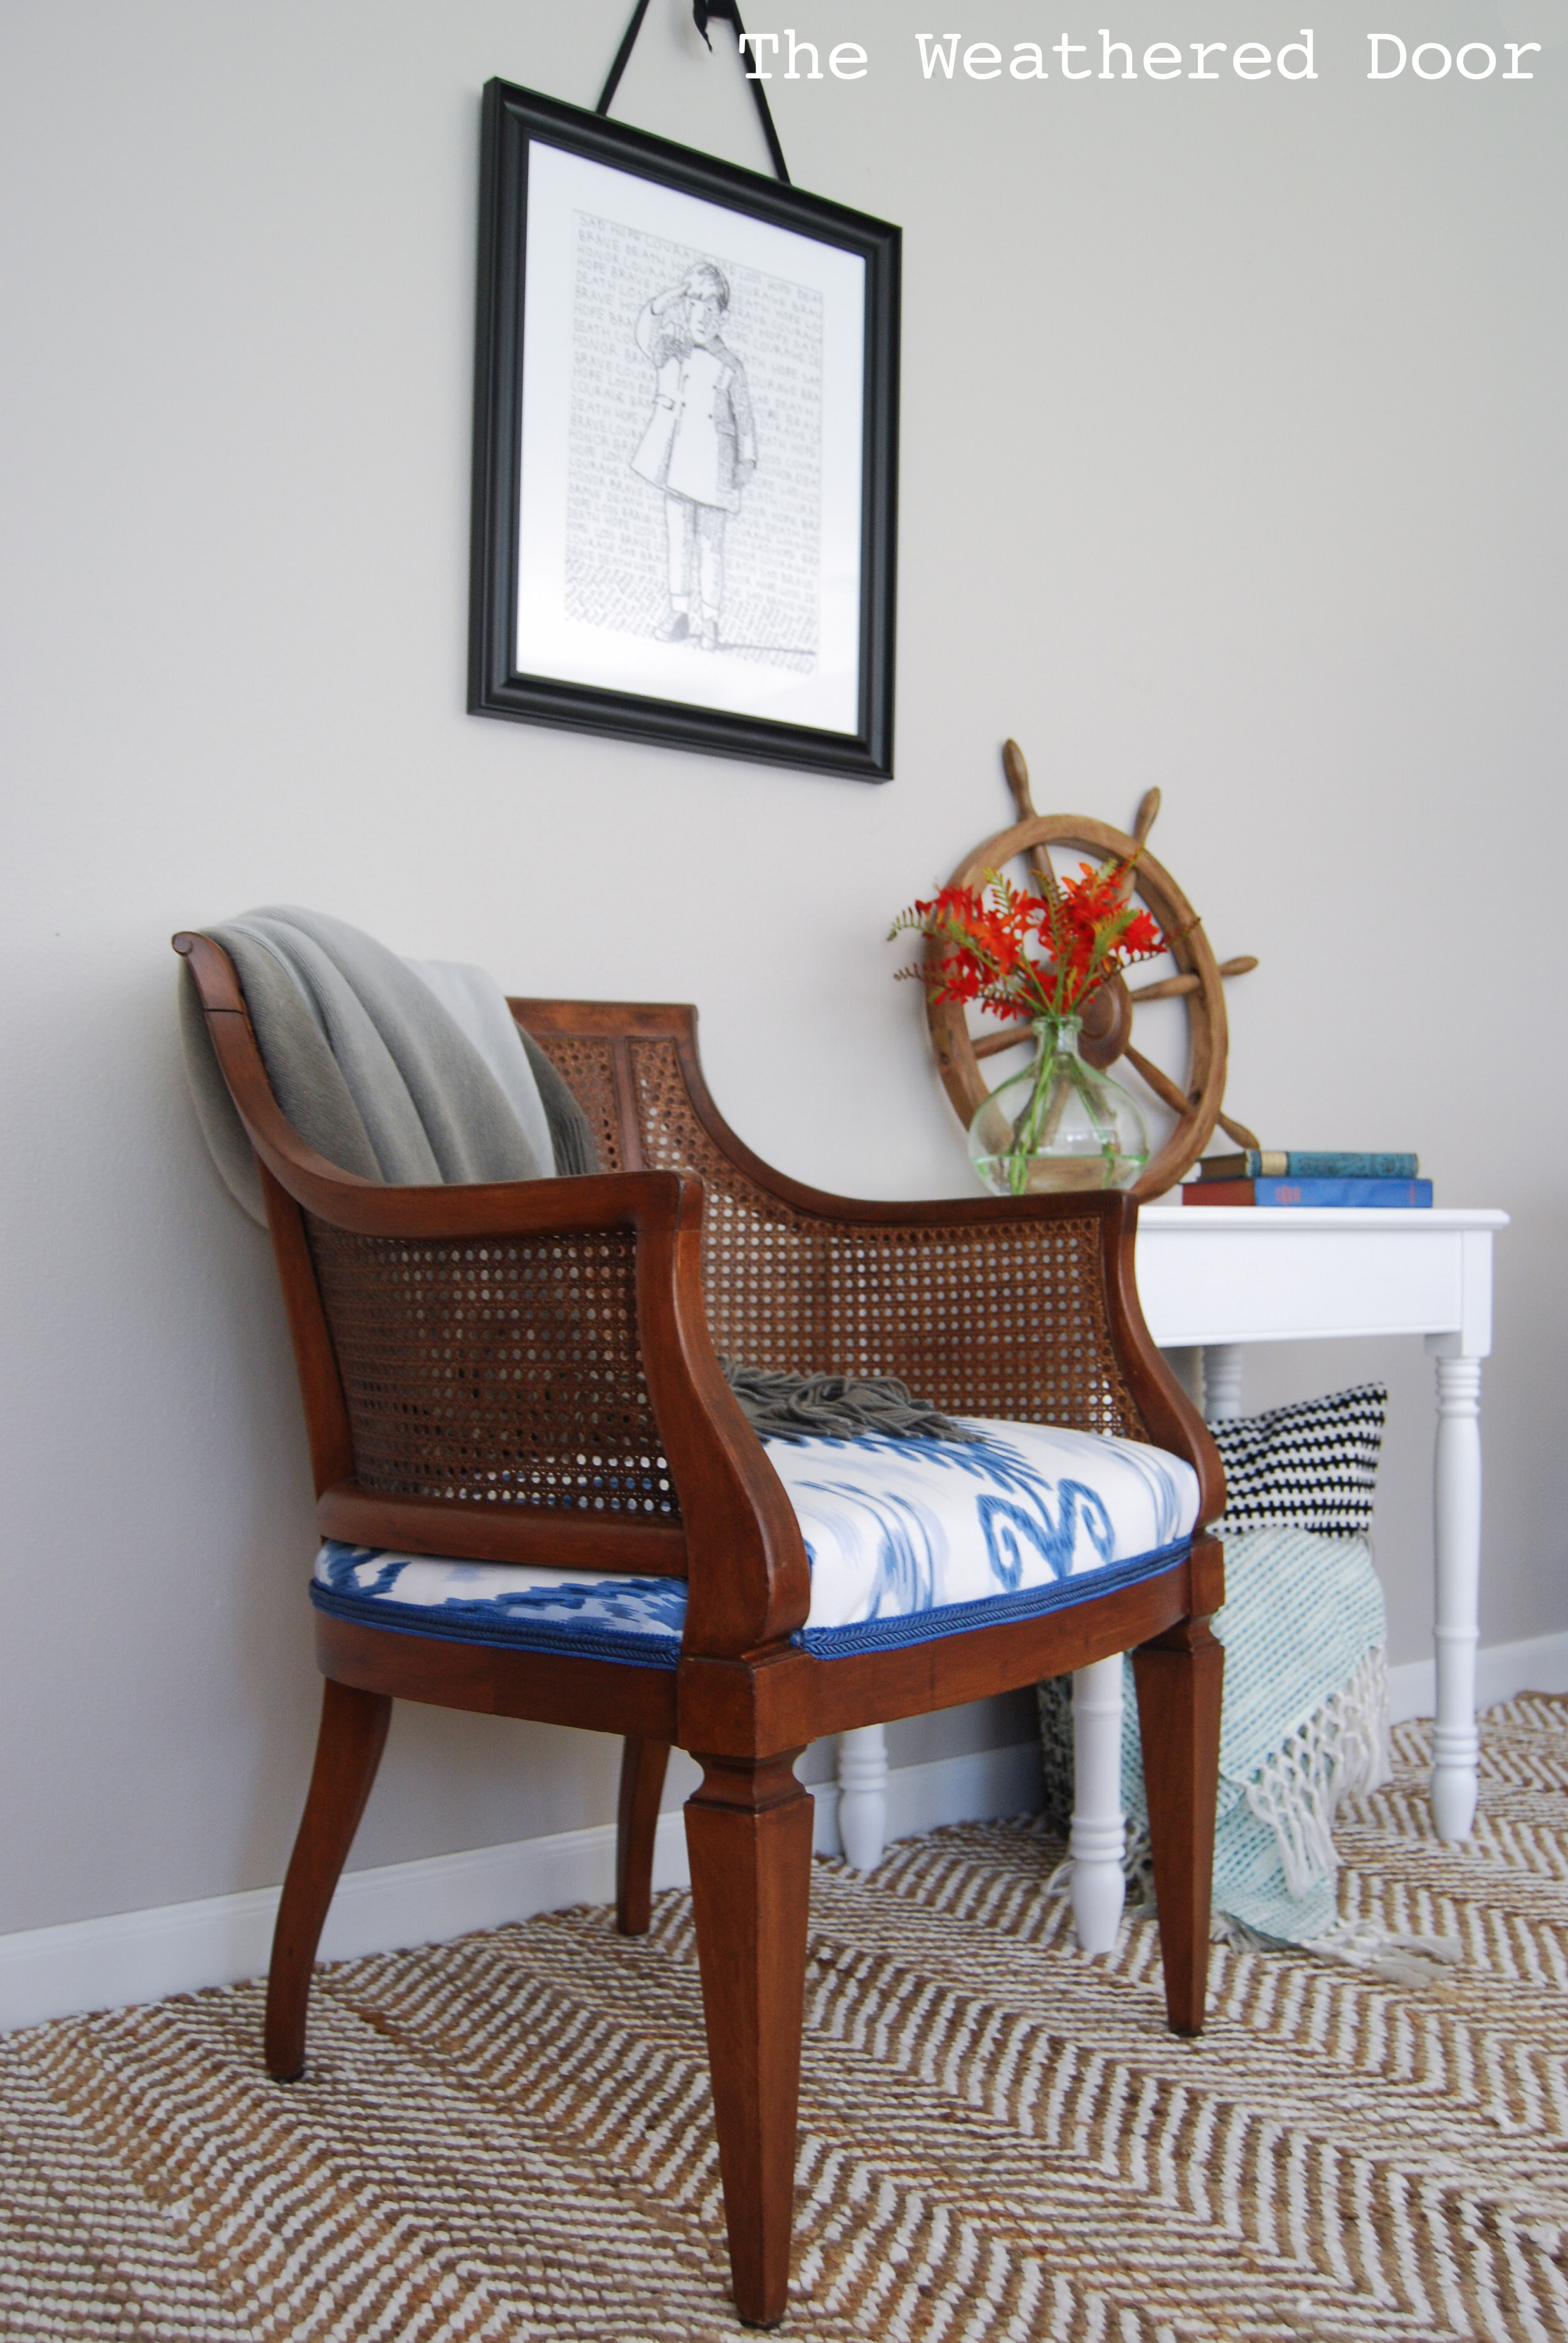
This makeover was 4 years in the making! It took long enough 😉 I originally purchased this chair from craiglist when I was redoing my room my Junior year of high school. I paid $35 for it (of course that was the price I negotiated) and it was the first piece of furniture I ever purchased. It all started here, folks! Here’s a middle-before shot (stained, not upholstered). And to show you the lovely fabric, there’s a close up, too.


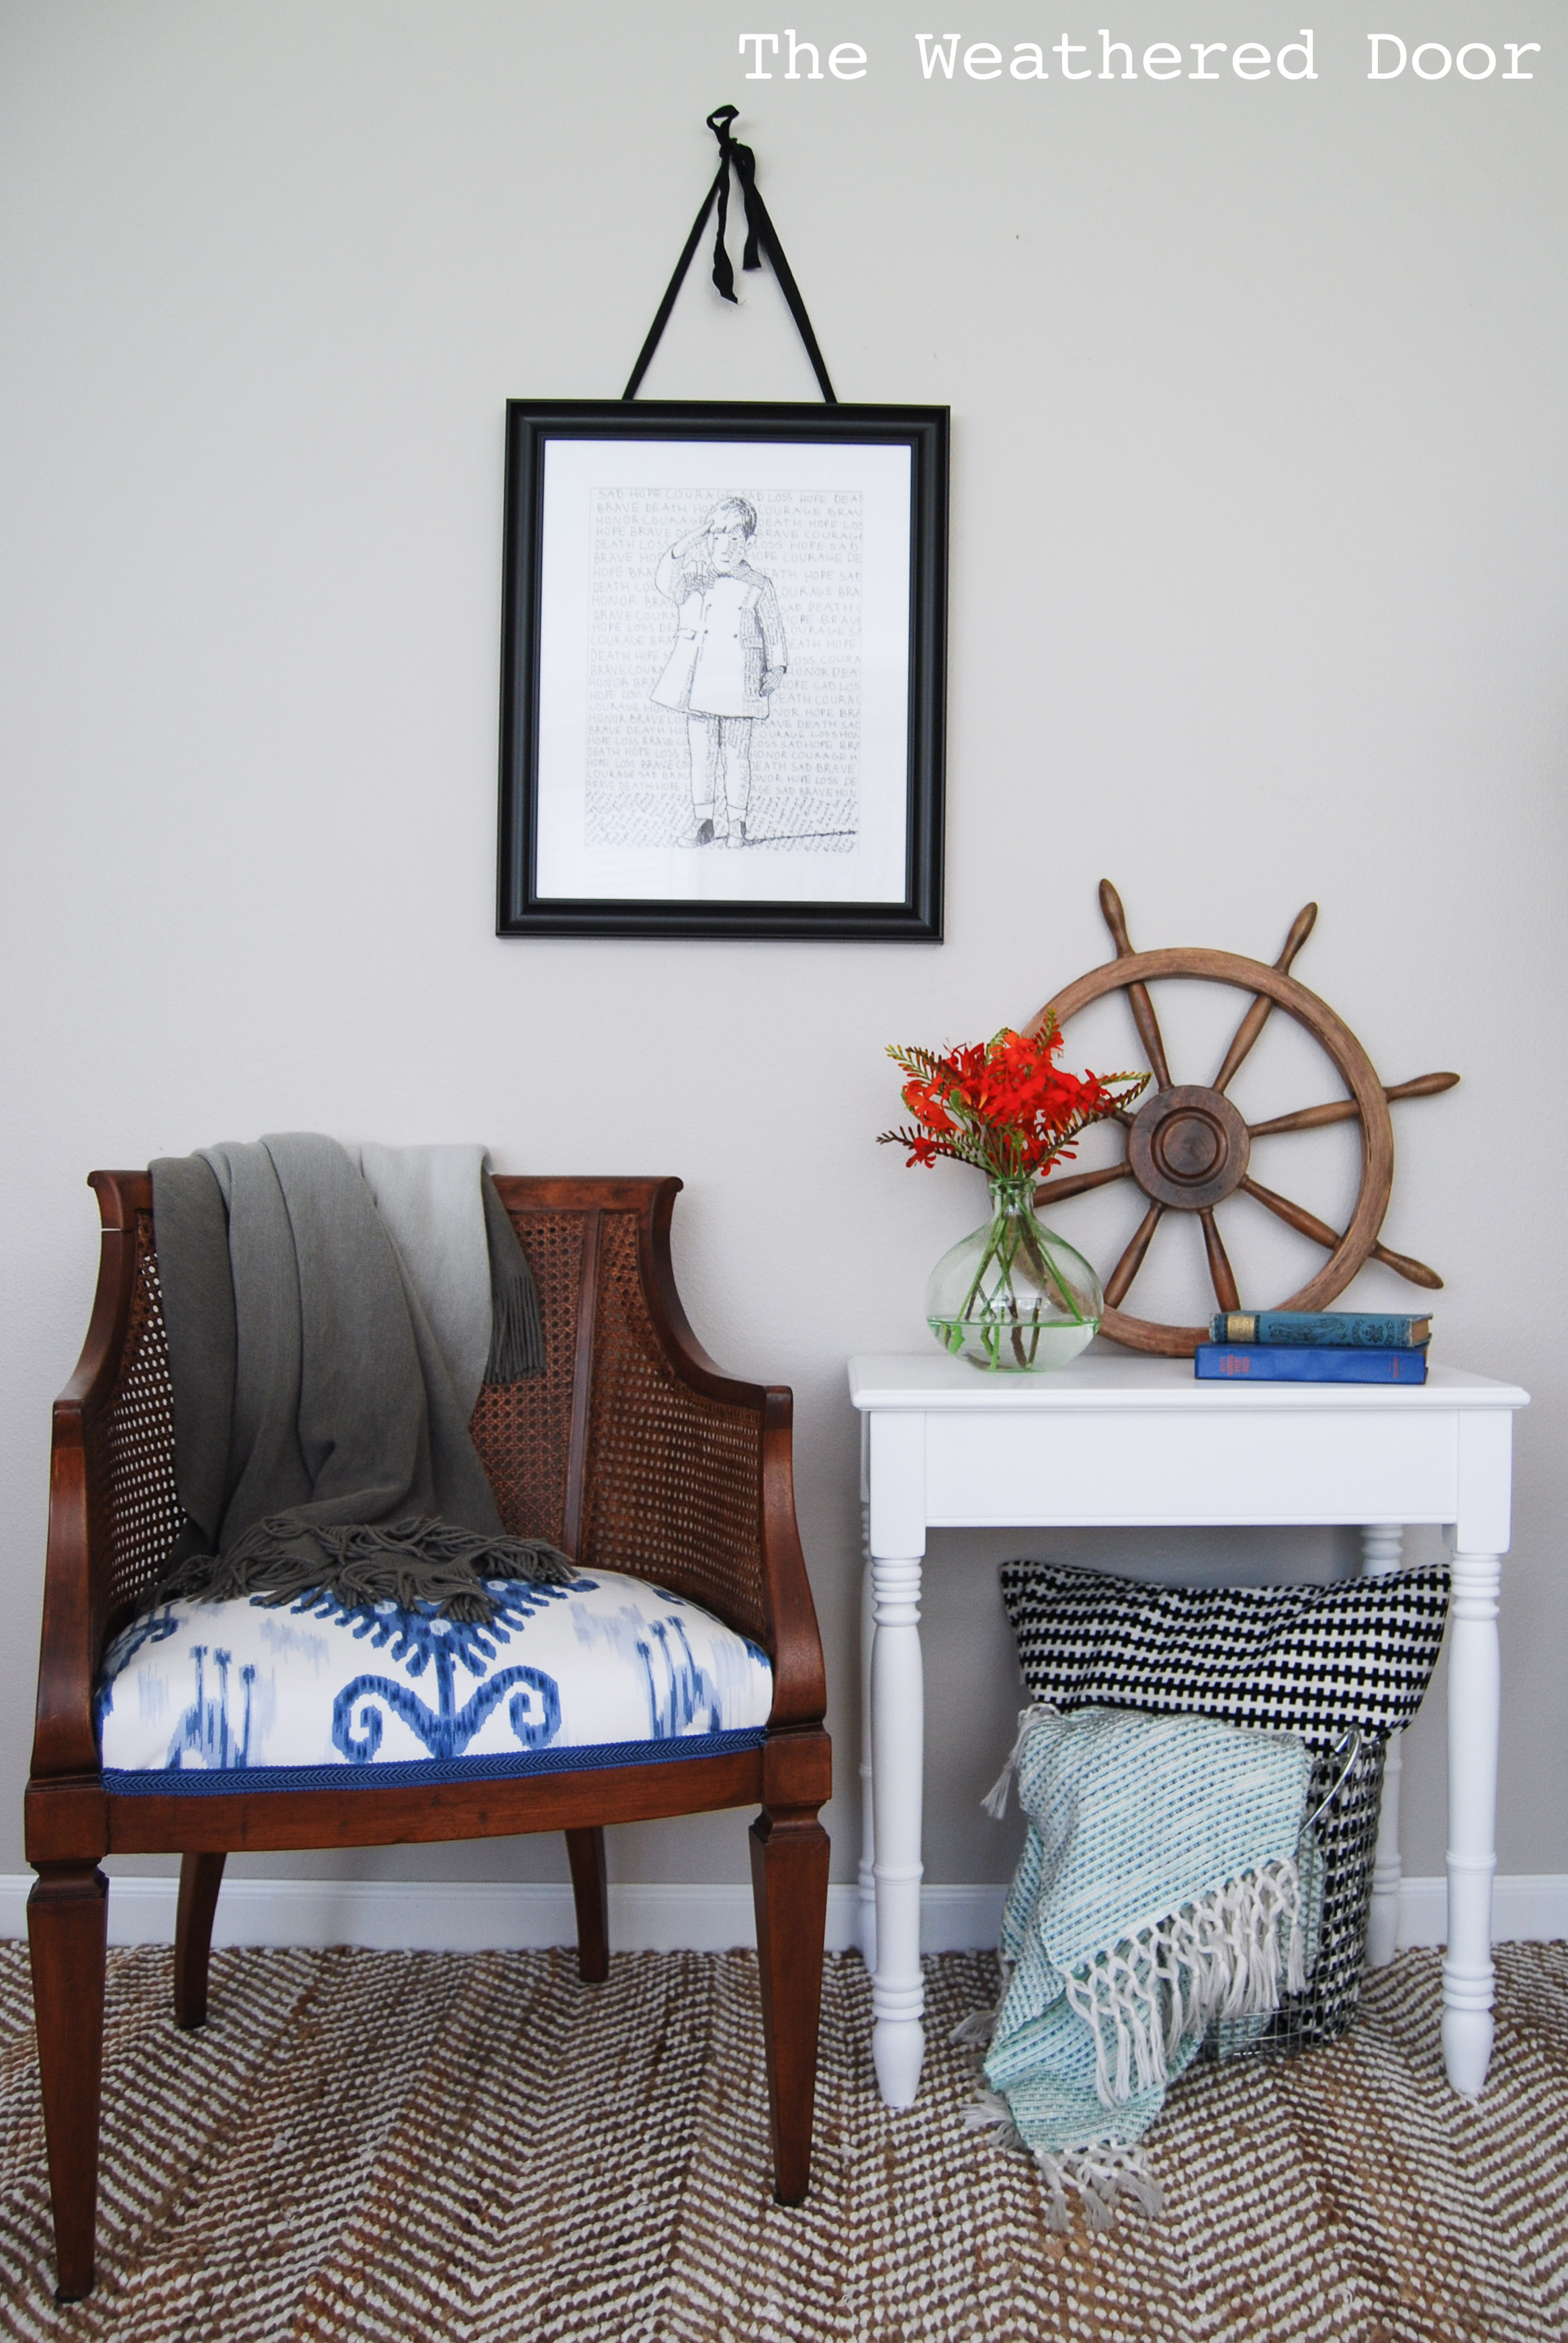
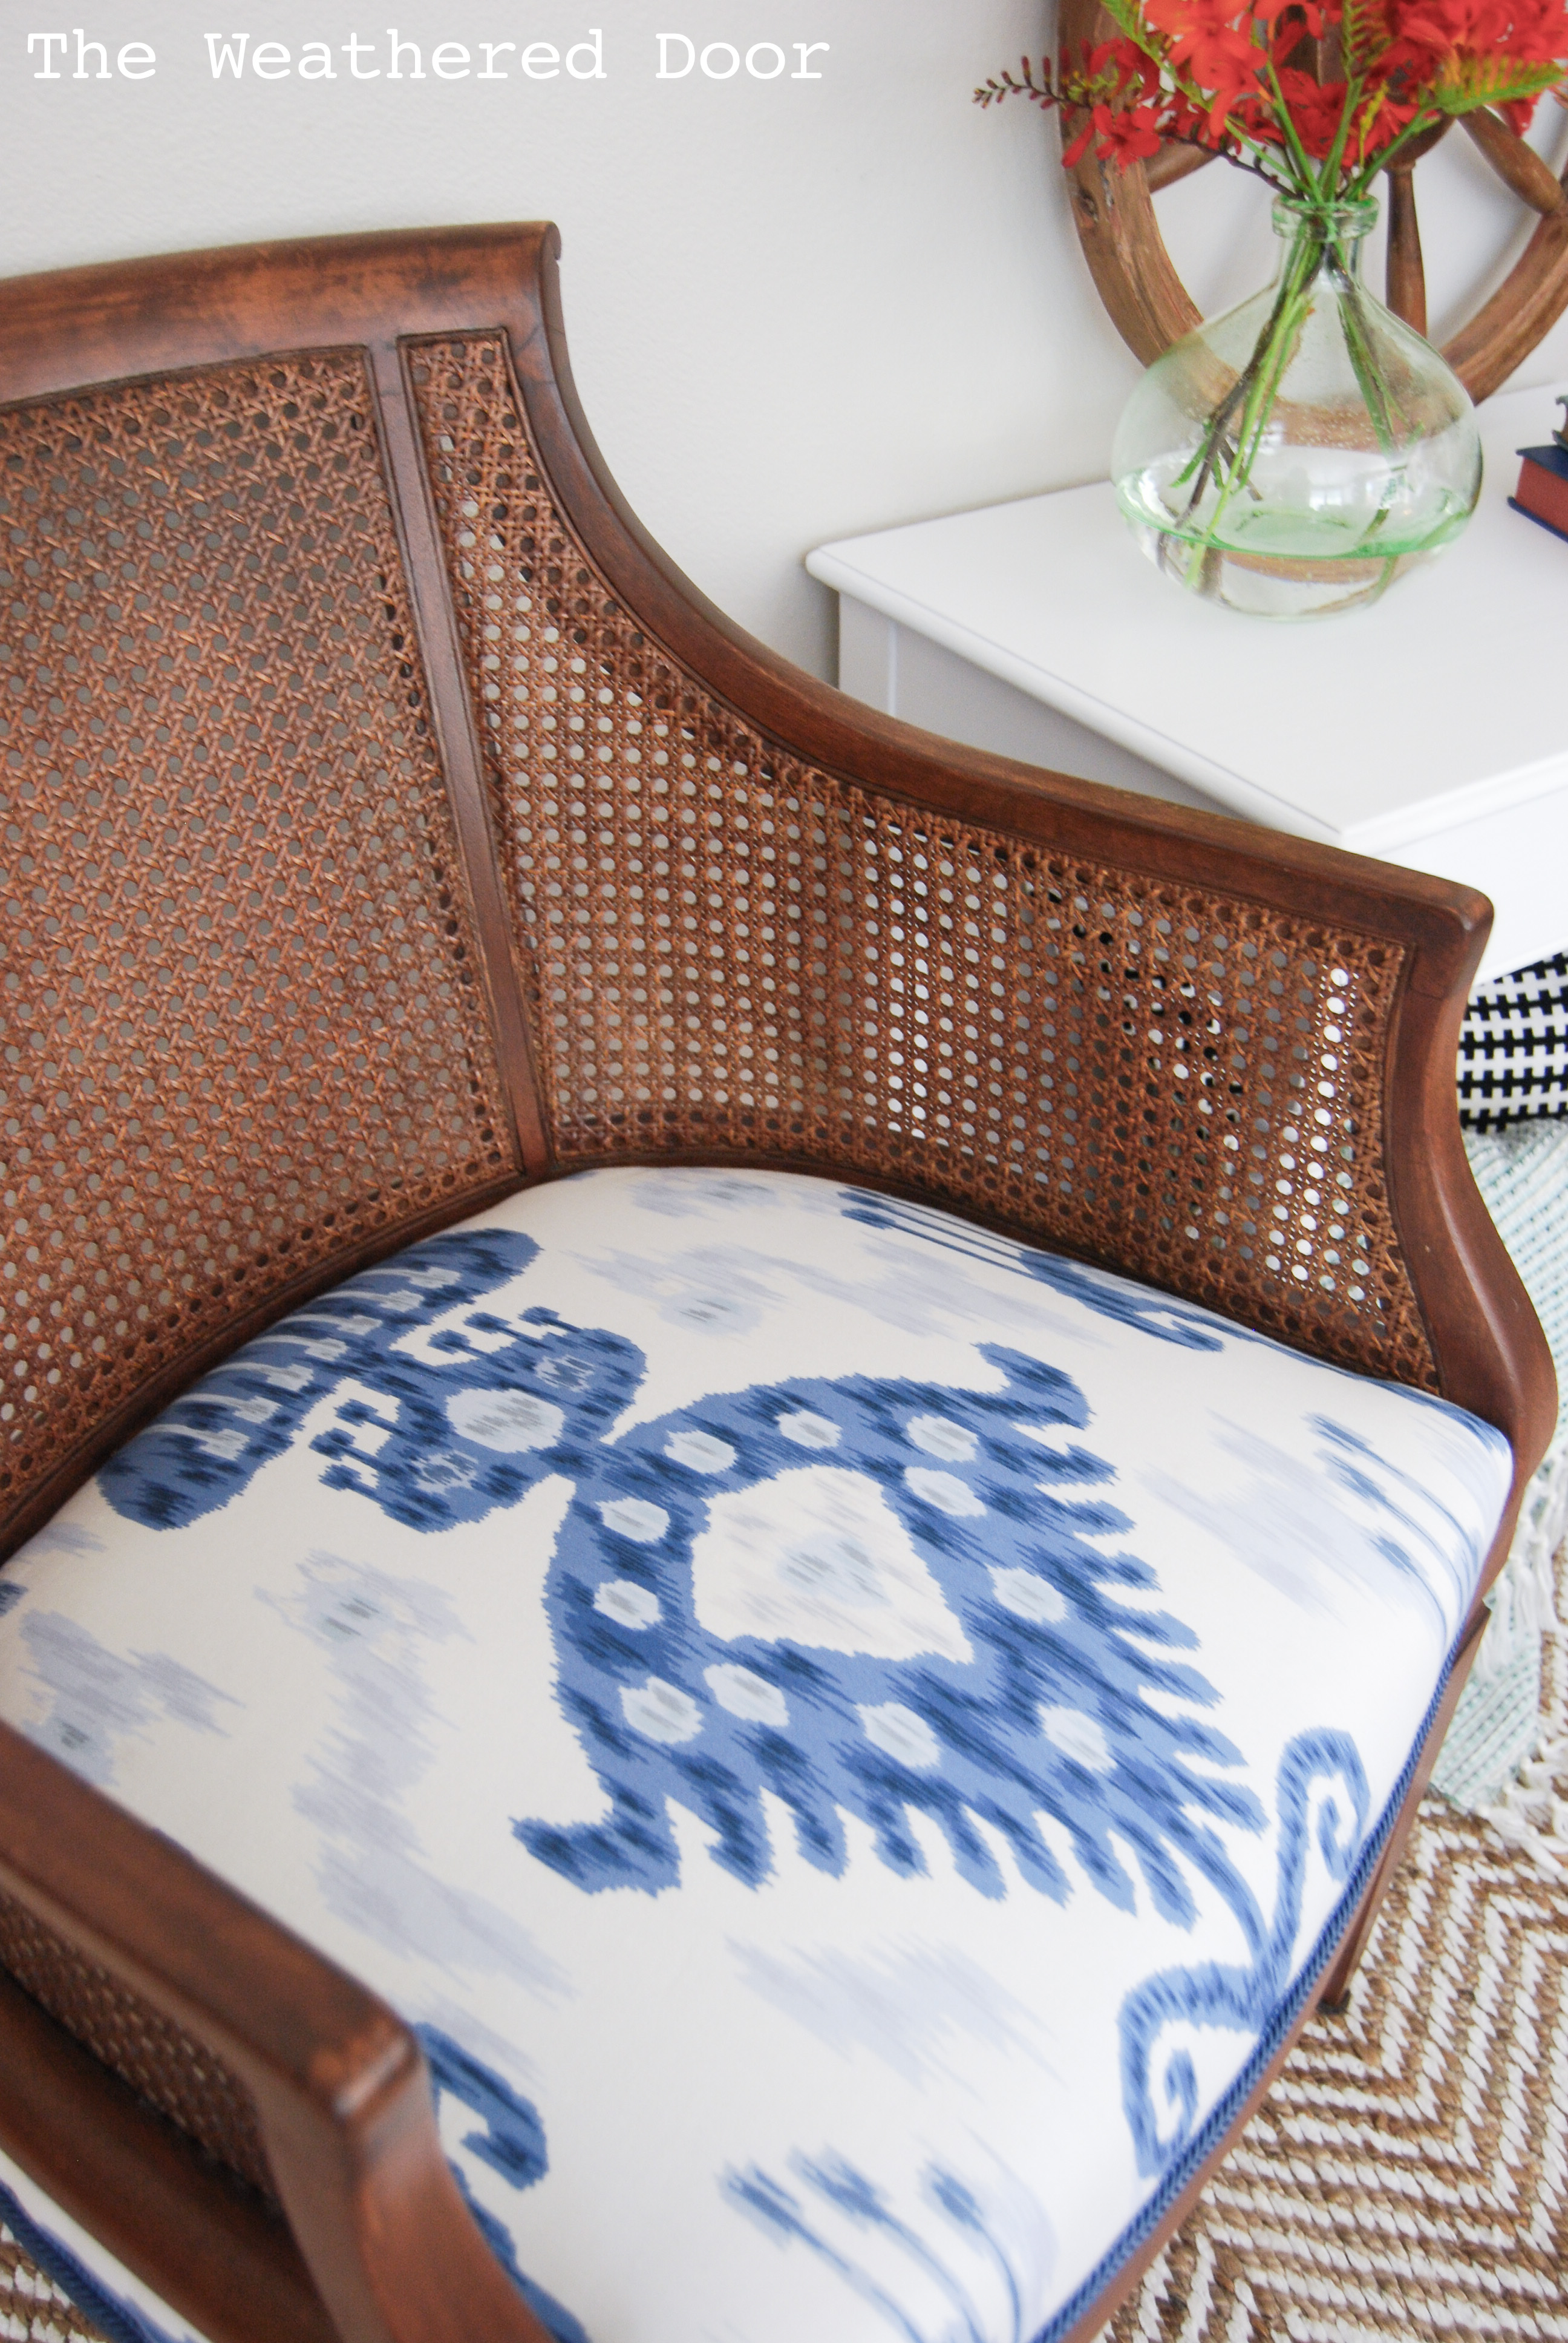
After we picked it up my mom sanded and stained it darker (this was before I began refinishing pieces). I knew the worn fabric needed to be changed, so I didn’t take off the fabric or cover it when she stained it, so for the last 4 years there has been some very dirty, worn and stain covered fabric on it. Finally, a year ago I found and bought a fabric I liked. I’m a sucker for blue and white, plus I love ikat. I bought the fabric from Joann’s, but it’s not one they have in stock, so I placed the special order during one of their big sales. You can also find it online, it’s Khandar Ikat Indigo by Robert Allen. I found it online here.
The fabric sat for a year (seriously, I’m terrible at sticking with projects), but I finally ordered a good staple gun that has some powered to it. It made the job much easier! I’m not going to go into every detail about how I went about upholstering it because I did write a post on how to upholster a chair last year. This one definitely came out better (probably because it wasn’t the first chair I did, and we had practice, so we knew what to change). My mom is always the one to help me with upholstery type projects. I honestly don’t know how people do it alone. Here’s what we did. I took off the trim, fabric and as many of the staples as I could. We then cut and stapled a piece of batting to the chair (only used 3-4 stables on each side just to hold it in place).
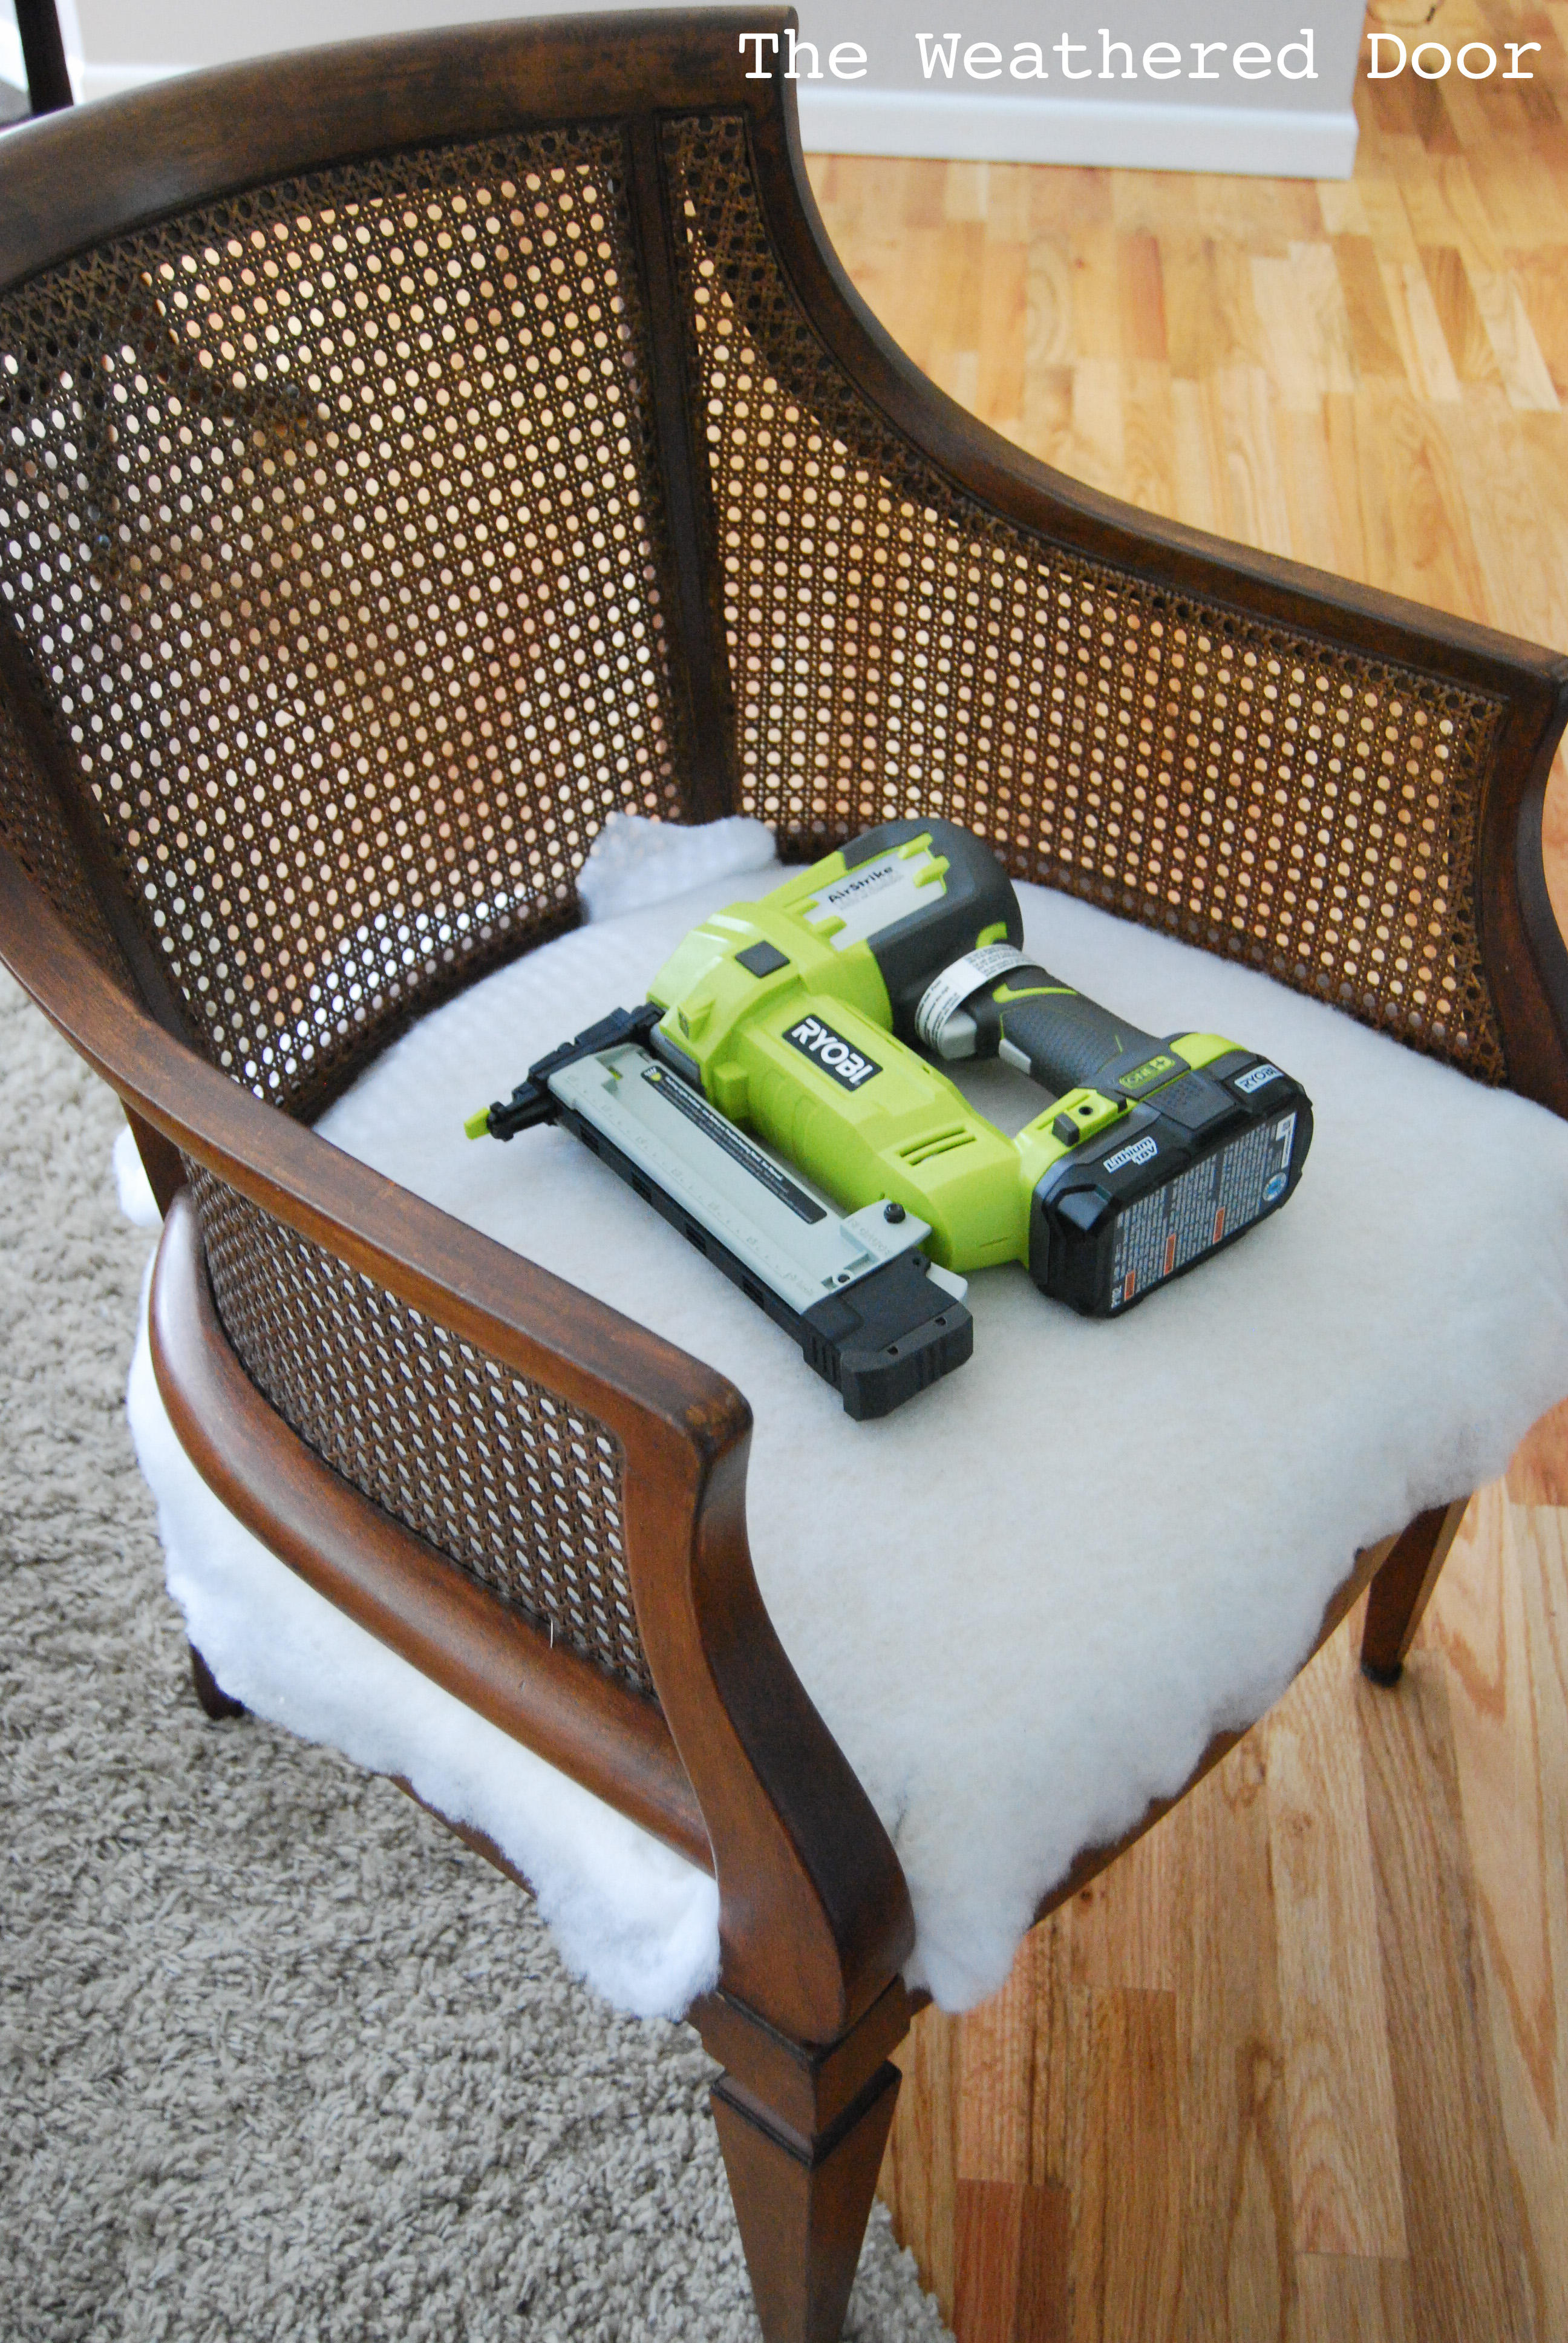
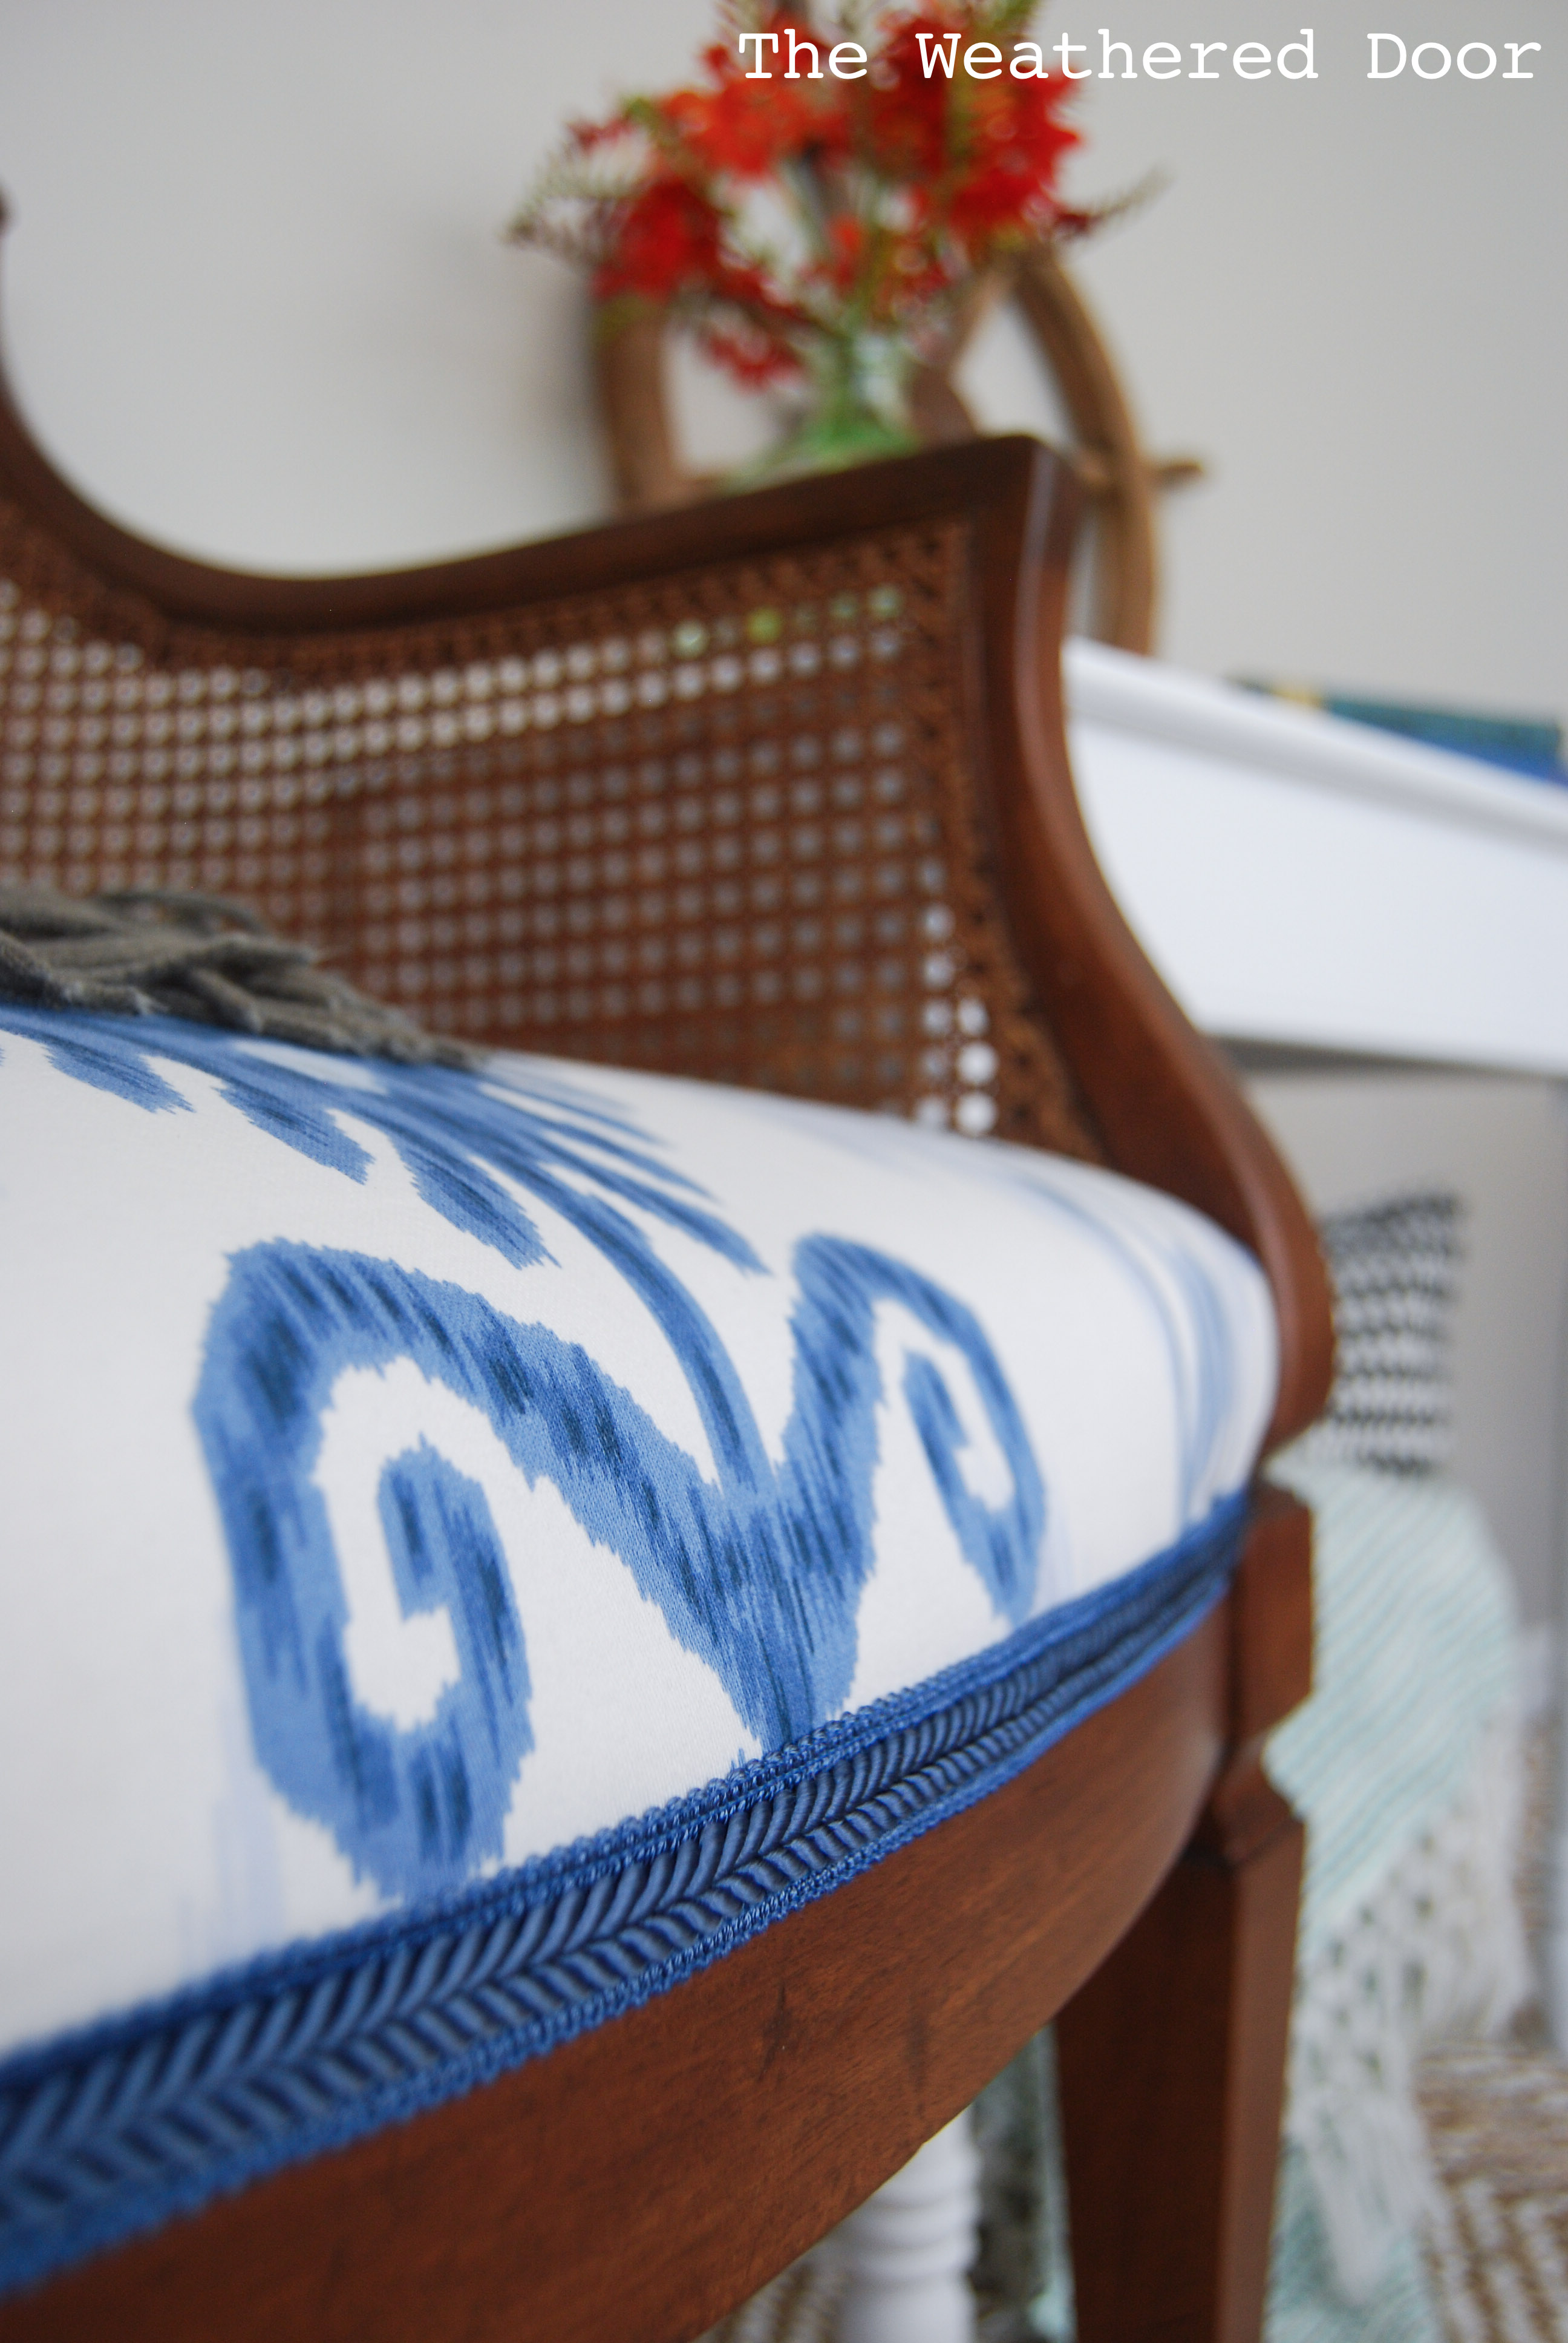
The chair had a piece of muslin over it, but it was off-white and we didn’t want anything to show through the light fabric. Next, I chose what area of the pattern I wanted centered on the chair, then cut a piece the approximate shape as the piece I took off, leaving 3-ish inches extra all around. Then, we put the fabric on, made cuts where it had to fit around the arms, made sure it was centered, then put a staple in the front center, back center, and then the center of each side. If you every upholster a chair, make sure to start stapling in the center of each side, then work your way to the corner. This is how you avoid having pleats in you fabric. It really just takes some playing with and pulling the fabric different ways to get a smooth look. Once everything was stapled on, I trimmed the excess fabric. Neither my mom or I knew of wanted to attempt sewing doubled welted cording, and we just so happened to find some trim the matched one of the blues perfectly, so we went with that. (Check out this post to see what we used to adhere the trim and seal the edges of the trim so they won’t fray). Once the trim was glued on, this chair was finished!
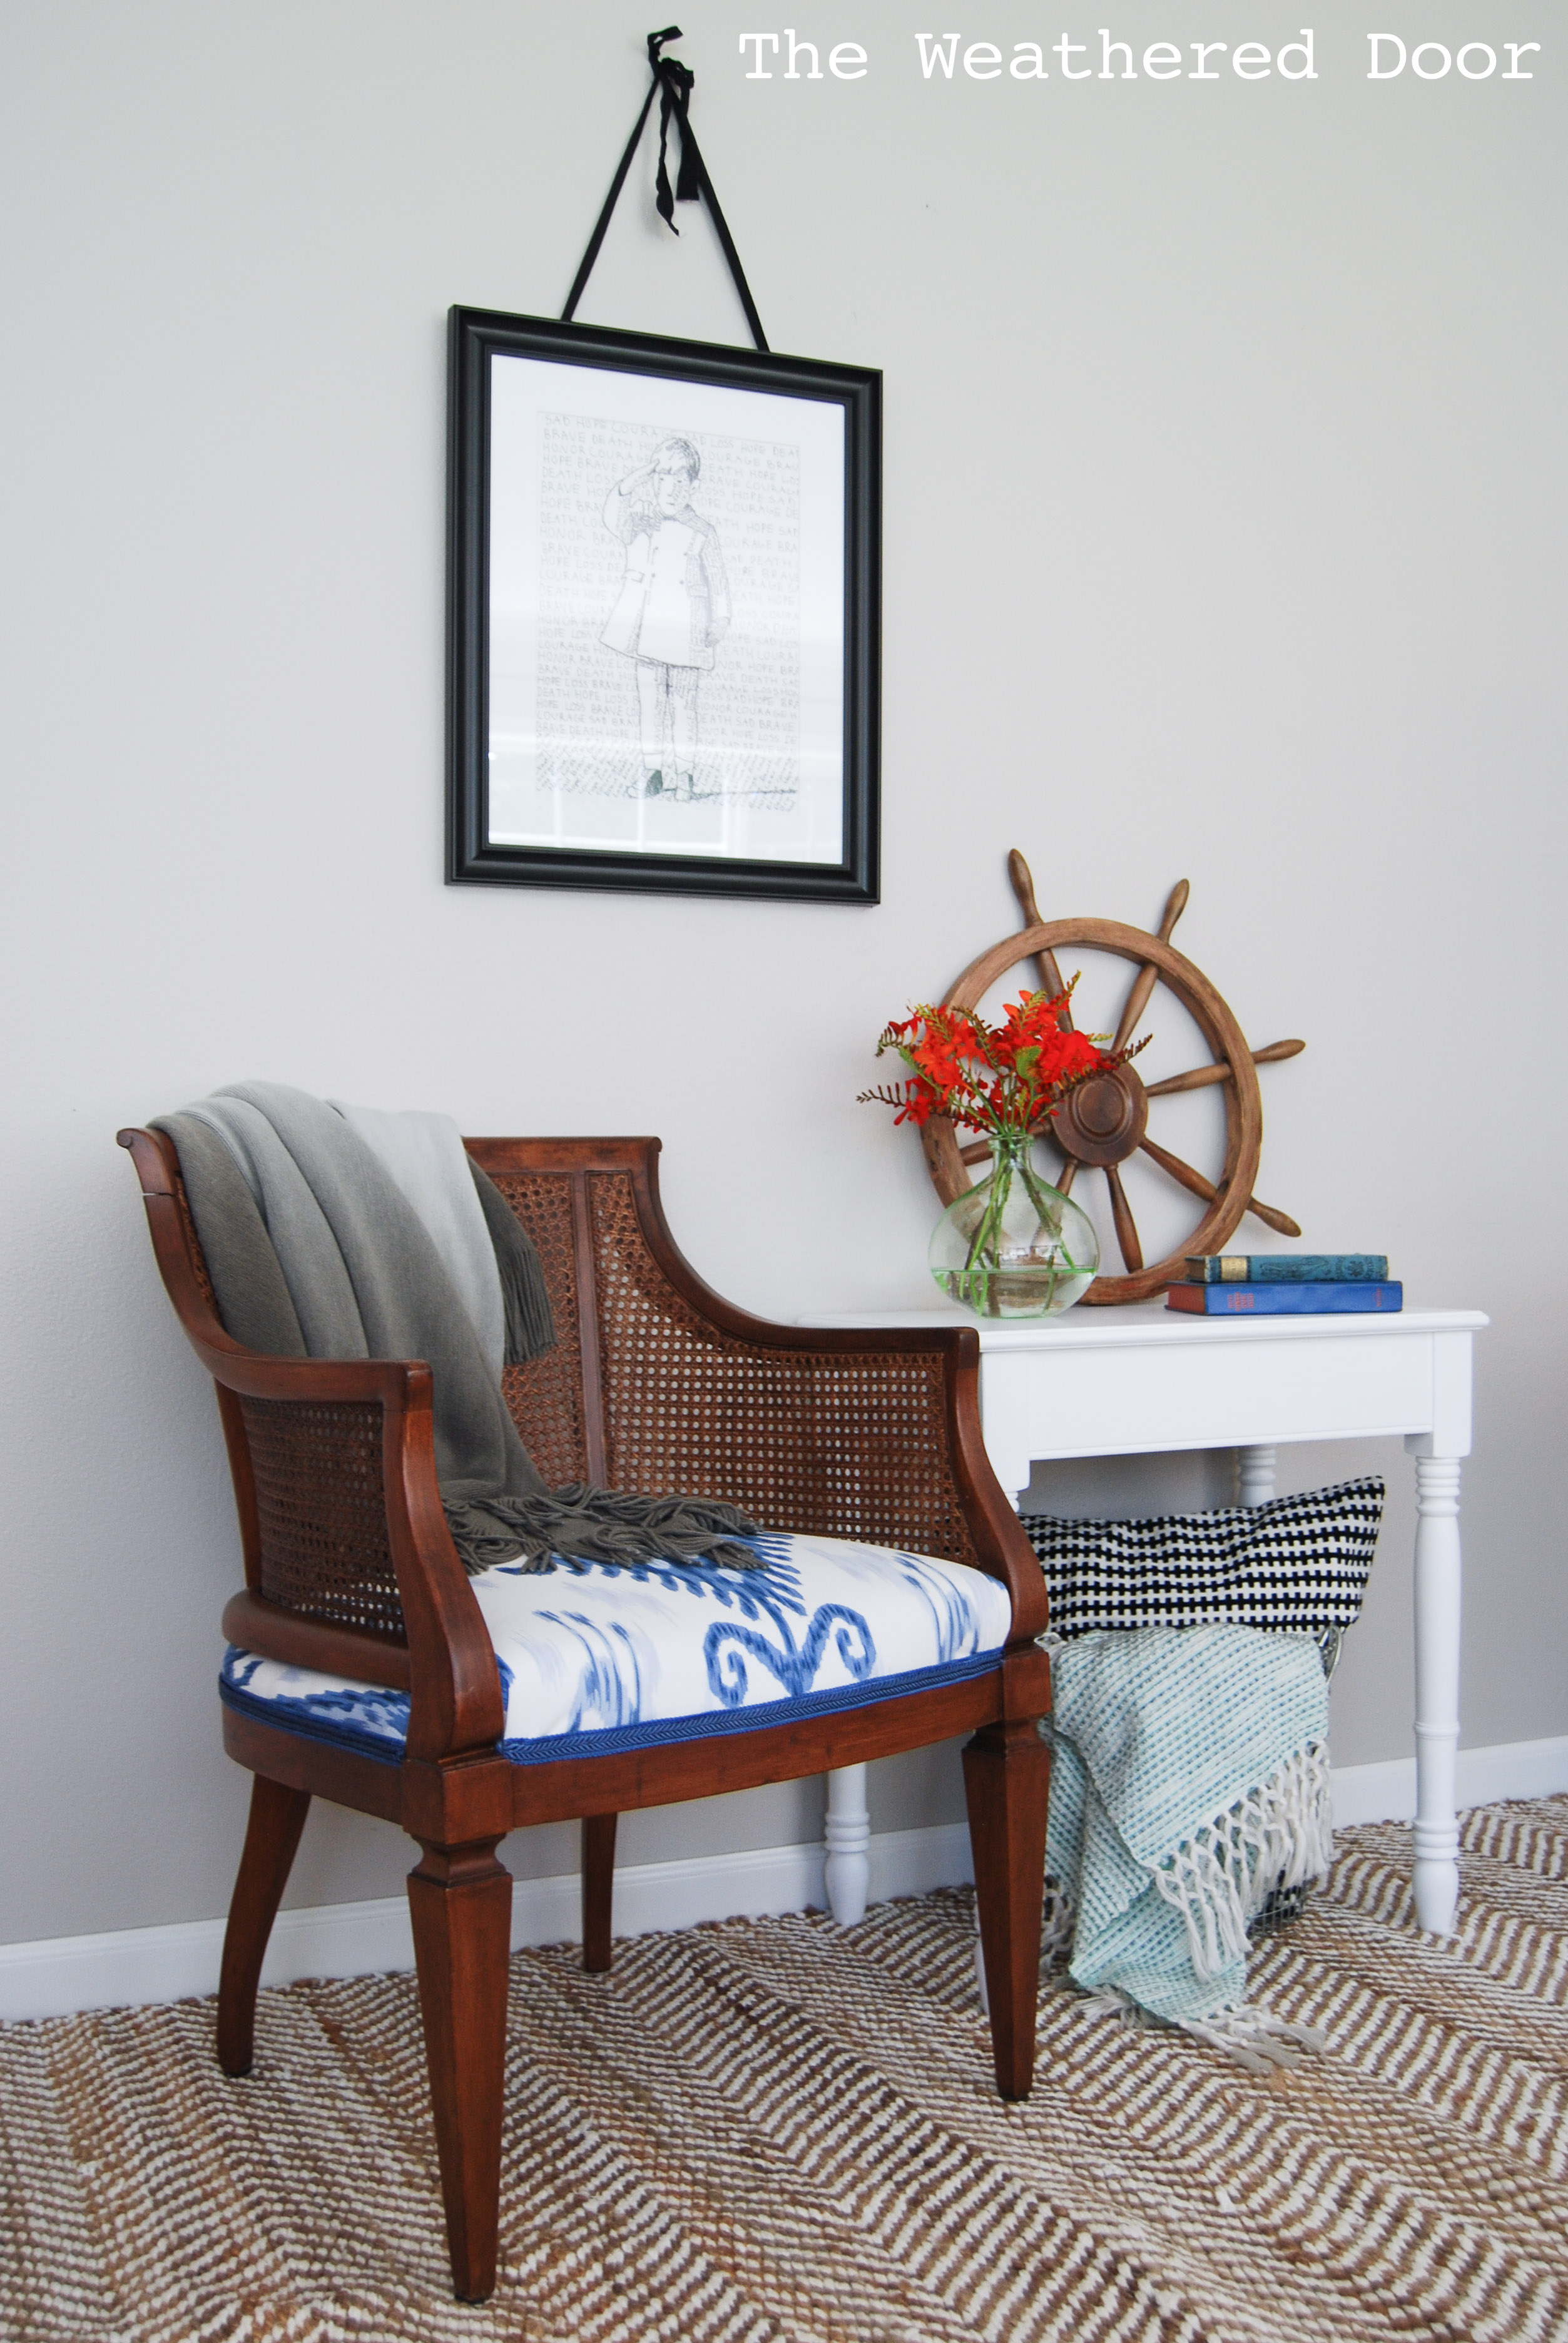

What a darling chair and a great fabric choice!
Your chair turned out beautiful, love that fabric and what a transformation, such a great job and a great tutorial…thanks for inspiring me to redo a chair I have had for years…
Your chair is beautiful and so is the fabric–well done!
Love, love, love this makeover!! So inspiring and I love the colors in your photo!