• Privacy Policy
  • Categories
  • Resources
  • Videos

The Weathered Door

  • Home
  • About
  • Before and After
  • Paint Method
  • Press
  • Contact

Removing Veneer and a Plan for a Dresser

March 27, 2014 By Reeves @ The Weathered Door 11 Comments

I’m taking the plunge and painting a dresser orange. Yes, you heard that right, orange! I’ve been waiting a while to find the right piece, but now that I have it I’m excited to see it come together. I was set on finding a great antique or vintage dresser that wasn’t super ornate and had cleaner, straight lines. I love a dresser with turned legs and carved details, but with a color like orange, I tried to find a piece that was less “girly” and could work in any space or kids room.

Update: You can see the reveal of the orange dresser here.

I picked the dresser up off of craigslist. I asked all the usual question to find out as much as I could about the piece and its condition, but when I arrived I was surprised to see the top was not in the condition I expected. It was bubbling and lifting in some areas (the center of the top). Someone has re-veneered the top in 4 section, so there were multiple seems that were now coming apart and that baby had been shellacked… and it was not done well. Even though it had problems, it still came home with me 🙂
Normally I stay away from pieces like this, but sometimes it’s worth it. I’ve personally never taken off veneer, but my mom has done it before with a wet towel, kettle of hot water and an iron. To take the veneer off the top of a piece, the iron technique took almost 2 hours. I decided to try a new technique that involves a putty knife and hair dryer. That’s it.
I saw this tip from Helen of Picked & Painted when she shared it a while ago on her facebook page (go like her page!) and decided it was at least worth a try. I used a crappy old hair dryer for this, just held it over the corner for 10 seconds or so, then slid the putty knife under the layer and continued heating then sliding the putty knife, and off the first piece came. Some areas were glued better than other so it took a little bit more heat and some strength (ha!). I just kept working my way across the top.
Once I got a section of the veneer lifted, I broke it off with the putty knife so it wasn’t in the way and I could keep working. All in all it took about 20-30 minutes to do the whole entire top of the dresser. Will definitely be using this technique again. Now, just using a hair dryer worked well for me because this veneer was glue on top of old veneer and wasn’t adhere super well. If I were removing veneer that is well glued, I would use a heat gun. I haven’t invested in one yet because I tend to stay away from pieces that need veneer removed, but for the next piece, that will most likely be the route I go.

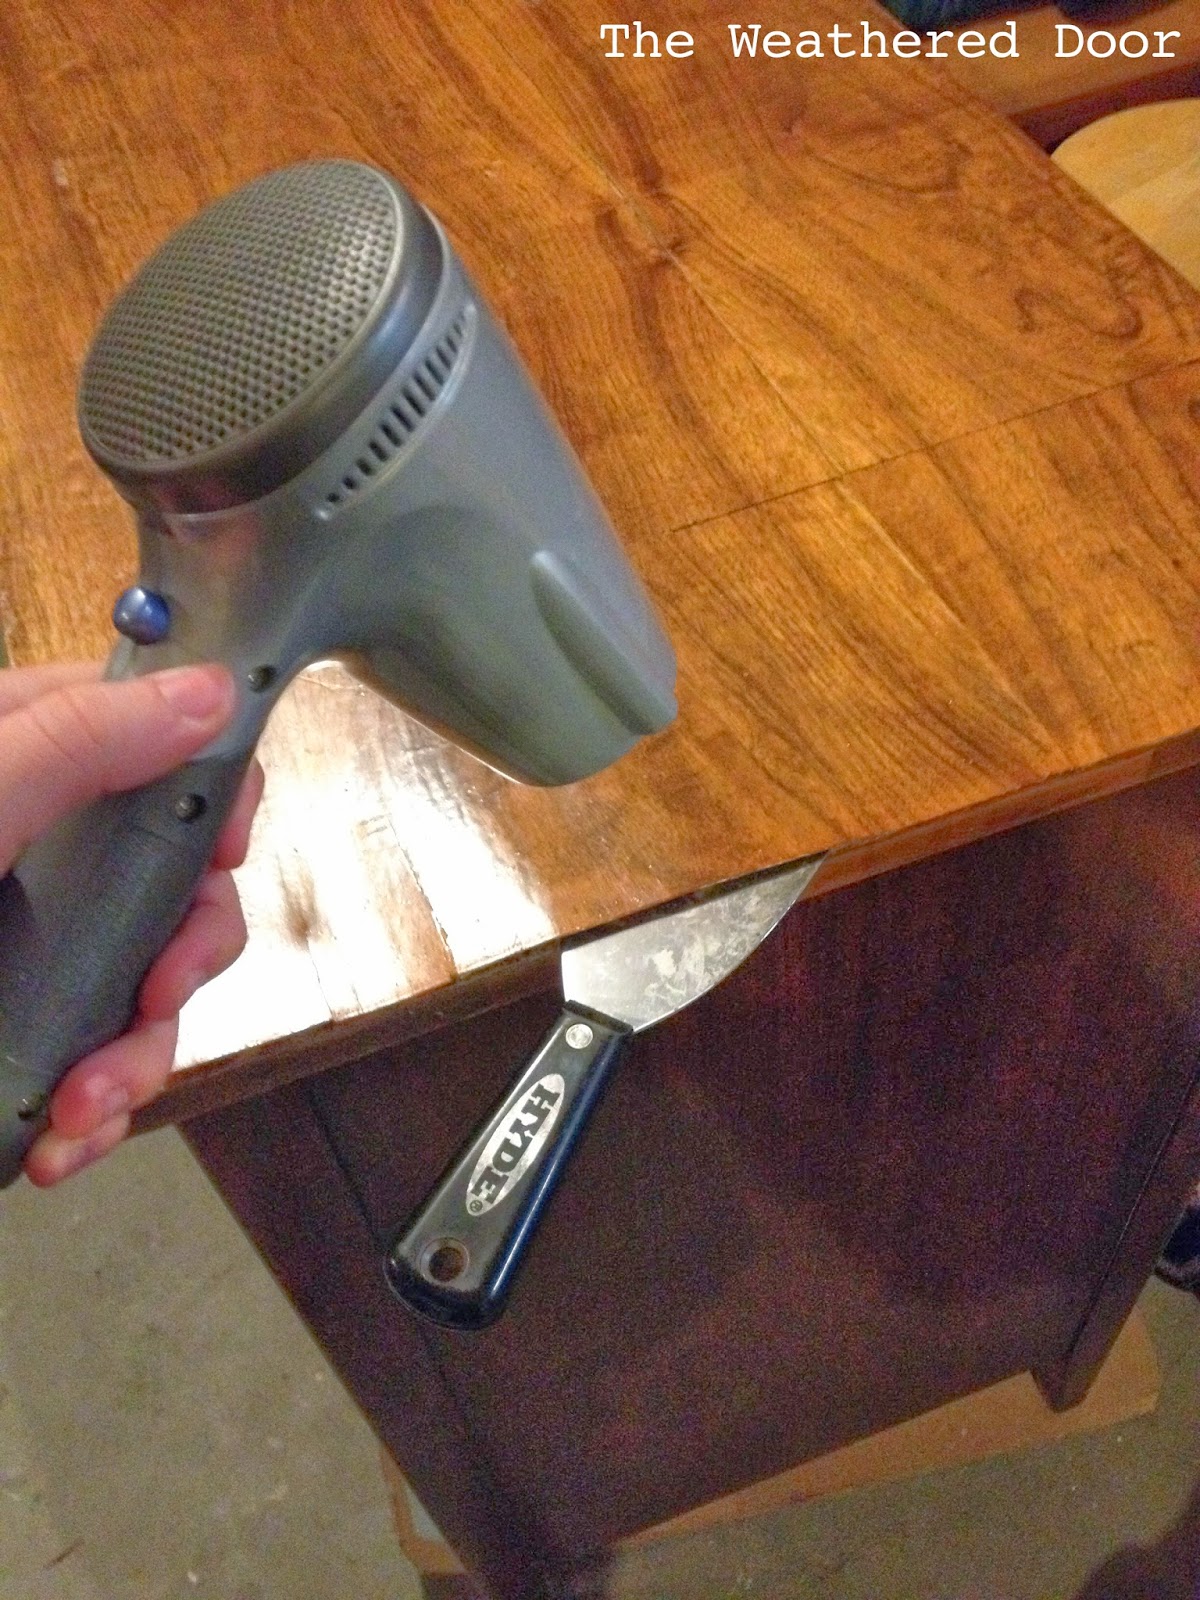
The top still needs to be sanded down and the rest of the piece prepped, but I’m on my way! And, here is the plan for the dresser. It’s getting painted with milk paint in the color Pumpkin. I am hoping it’s not a bright, bright orange, but more earthy toned. I found this dresser on pinterest from Poppyseedliving and it’s for sale in her Etsy store. I love the tone of the orange paint on it, and I’m hoping for a similar color. For hardware, I’m changing out the pulls (which I do love, they just aren’t part of my vision for this piece) for some large bone knobs. I’m keeping it neutral with the hardware since the color will draw so much attention.

Linking up with:
 DIY Show Off * Mod Vintage Life * Knick of Time * A Bowl Full of Lemons * Elizabeth & Co. 
House on the Way * City Farmhouse * Domestically Speaking *
The 36th Avenue *Lilyfield Life * The girl creative * Liz Marie Blog * Miss Mustard Seed * Finding Fabulous
Classy Clutter * Rain on a Tin Roof * Handy Man, Crafty Woman * Silver Pennies

Filed Under: Furniture Makeovers, how to, Tips and Tutorials

  • Email
  • Facebook
  • Instagram
  • Pinterest
  • Twitter
  • YouTube

Subscribe to our mailing list

* indicates required
« A Grey Buffet with a Green Interior
Grey and White Claw Foot Pedestal Coffee Table »

Comments

  1. RPK Interiors says

    March 27, 2014 at 8:11 pm

    Thanks for the reminder about using a hair dryer to remove veneer. I've not yet tried to remove veneer, but will keep this tip in mind! By the way, you and Helen rock! 🙂
    Robin

    Reply
  2. Alf and Lily Creations says

    March 27, 2014 at 8:17 pm

    I'm doing my boys room in a few weeks and orange is the colour they want. This would be a fantastic piece, sadly I'm in London so I'll have to take inspiration and bit of courage and paint one myself 🙂

    Reply
  3. Jelena Pticek says

    March 27, 2014 at 9:28 pm

    Hey Reeves, this is Jelena of Poppyseedliving. Thanks for the mention. And keep on with the beautiful work you are doing. Love reeding your posts!

    Reply
  4. Tammy @ A Walk in the Countryside says

    March 28, 2014 at 2:18 pm

    Thanks for sharing this technique!

    Reply
  5. phoenixrestoration says

    March 28, 2014 at 2:34 pm

    Love the shape of this dresser! It's like the best of antique and mcm in one package. Can't wait to see the results…I know it will be gorgeous, as always. Great tips on veneer removal too. I haven't had the excitement of removing a veneer top, yet! 🙂

    Reply
  6. Elizabeth says

    March 28, 2014 at 4:45 pm

    Sounds great! The bone knobs will be a nice touch.

    Reply
  7. Helen says

    March 29, 2014 at 3:34 am

    SO glad it worked for you! The day after I posted that, I went and bought a cheap heat gun….I was using my new hair dryer. LOL….not my best idea : ) (thanks for the shout out too)

    Reply
  8. Robyn says

    March 30, 2014 at 11:28 am

    Good morning,
    I found your blog @ Silver Pennies Sundays and have been looking through your lovely before/after photos. Such beautiful work you do! The bone knobs on this dresser will be perfect. Have a fun Sunday 🙂

    Reply
  9. robin lorraine williamson says

    March 30, 2014 at 1:38 pm

    hi visiting from silver pennies I love your work can't wait to see how the dresser turn out thanks for sharing

    Reply
  10. Danielle says

    April 4, 2014 at 10:15 pm

    Wow! Great tip. I've never removed veneer so glad to read your tutorial. Love how the dresser came out.

    Reply
  11. Marsha May says

    March 12, 2016 at 3:38 pm

    Have you ever used Benjamin Morres primer for slick surfaces. It is Wonderful. You can paint any kind of surface after I swing it!!! I love it!!!

    Reply

Leave a Reply Cancel reply

Your email address will not be published. Required fields are marked *

  • Email
  • Facebook
  • Instagram
  • Pinterest
  • Twitter
  • YouTube

Search

Categories

Townhome Remodel Phase 1

Copyright

I love it when you share! Please note that all content and photos are property of The Weathered Door. You may share one photo with a direct link back to the post, but may not use more than one photo or a post in its entirety without written permission from me. Please do not edit, crop, remove or add watermarks to photos without obtaining permission first. Pinning is welcome! Thank you!

Copyright © 2025 · The Weathered Door