
A while back, maybe 2 years ago, I painted a dresser and chose to keep the original hardware. It went from a gold to an oil rubbed bronze, but I didn’t know what I was doing, and it was obvious. Right away the paint started chipping and I had to figure something else out. The good thing is, you can learn from my experience and skip all of the mistakes! So, here are the steps for how I paint hardware.
How to Paint Hardware
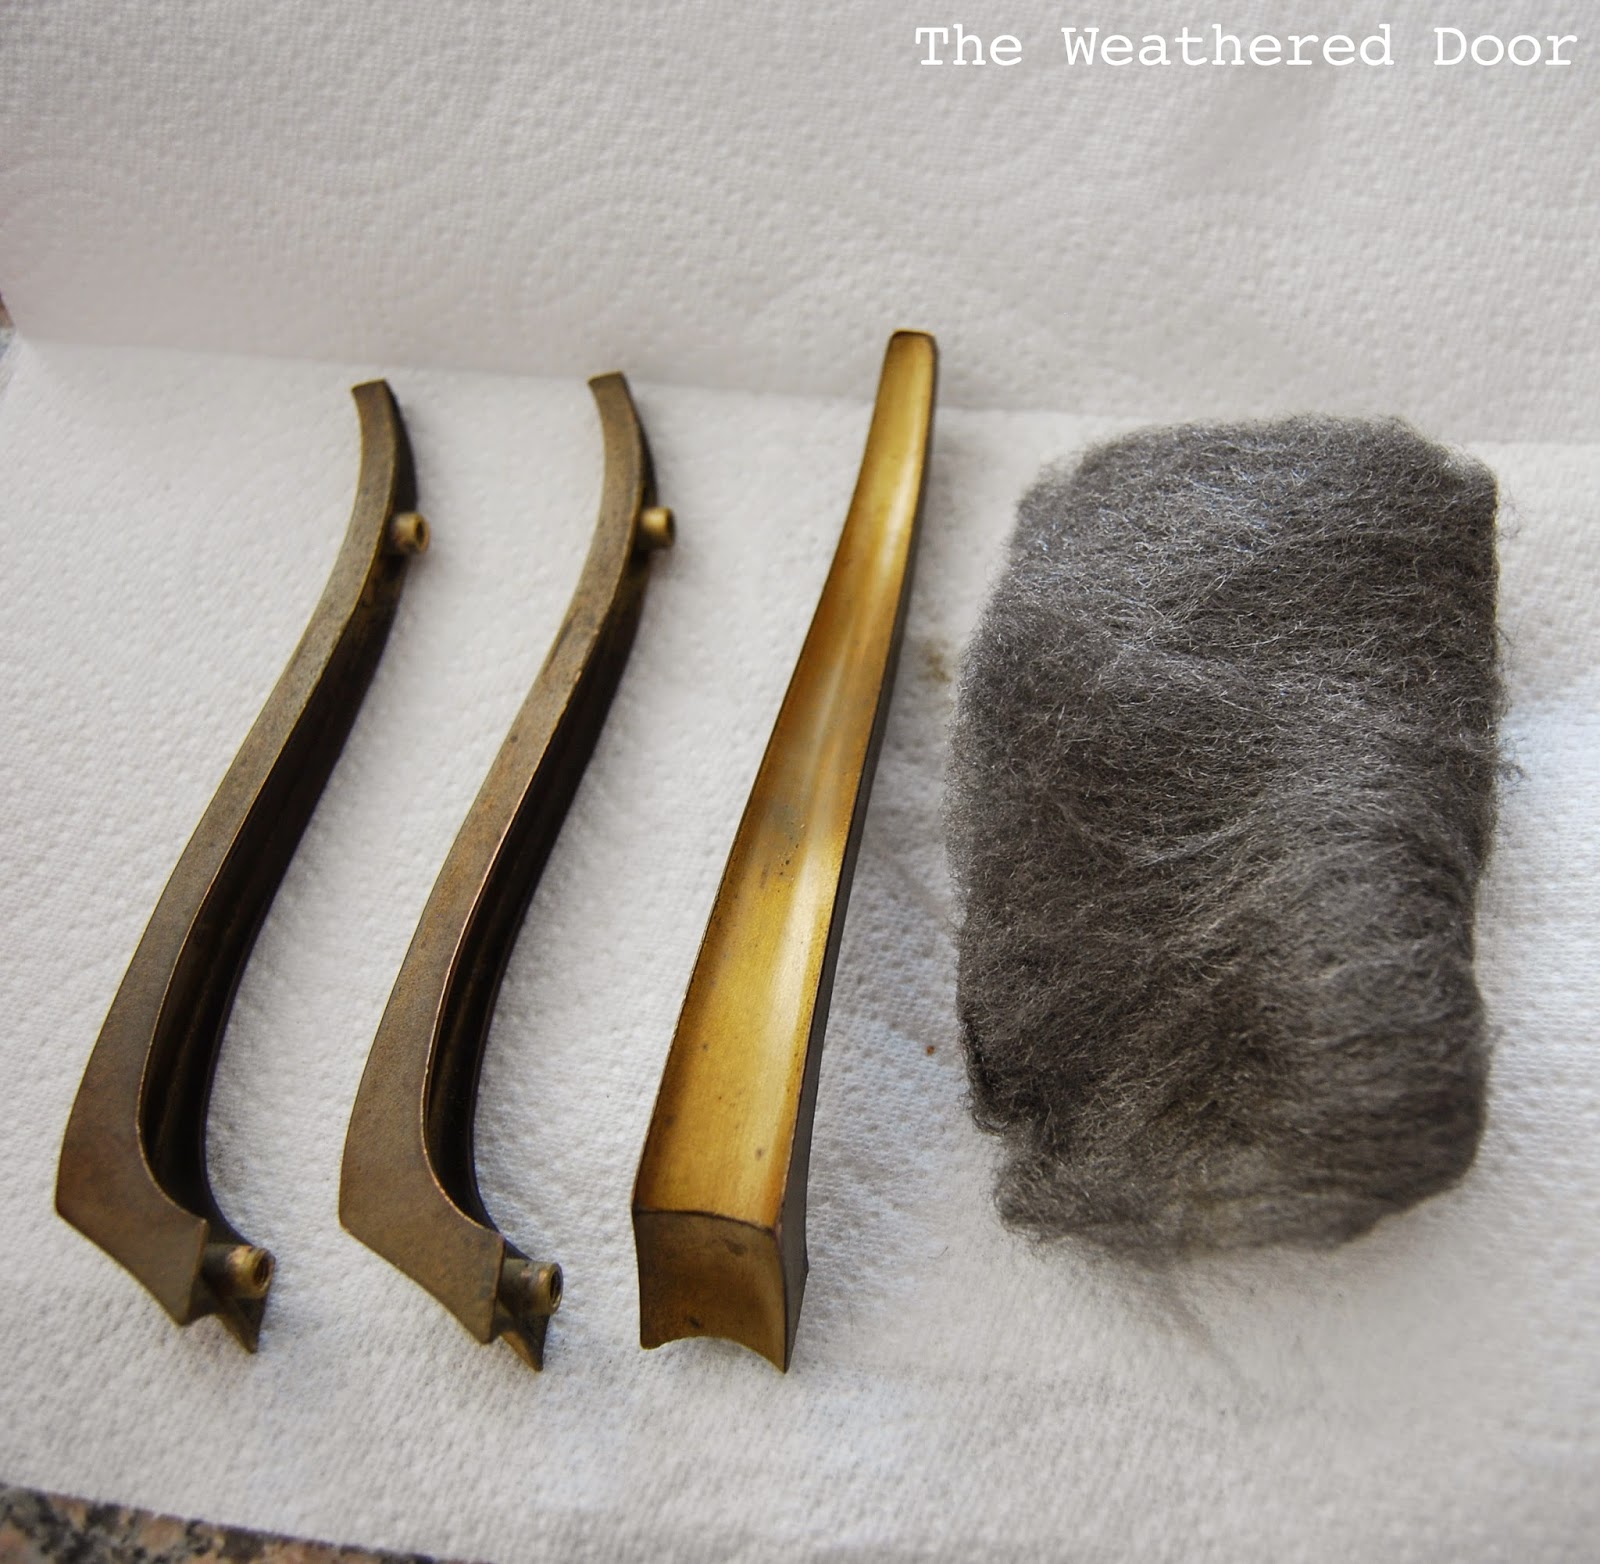
1. Remove your hardware from the piece and clean it with tsp wash or a degreaser.
You can use synthetic steel wool (I always have SSW on hand and use it for so many things) to help get any old flaky finish off if you need and smooth everything out, then wipe the hardware down with a cleaner. Soap and water works just fine (that’s what I use, or a liquid cleaner/degreaser). You want to get all oils and grime off of the hardware to prep for the finish you are about to put on.
If there is old finish flaking off of the hardware, you will need to strip it with citristrip. See this blog post for how I strip and polish brass hardware instead of painting hardware (there’s also a video).
2. Wipe off the hardware and let it dry.
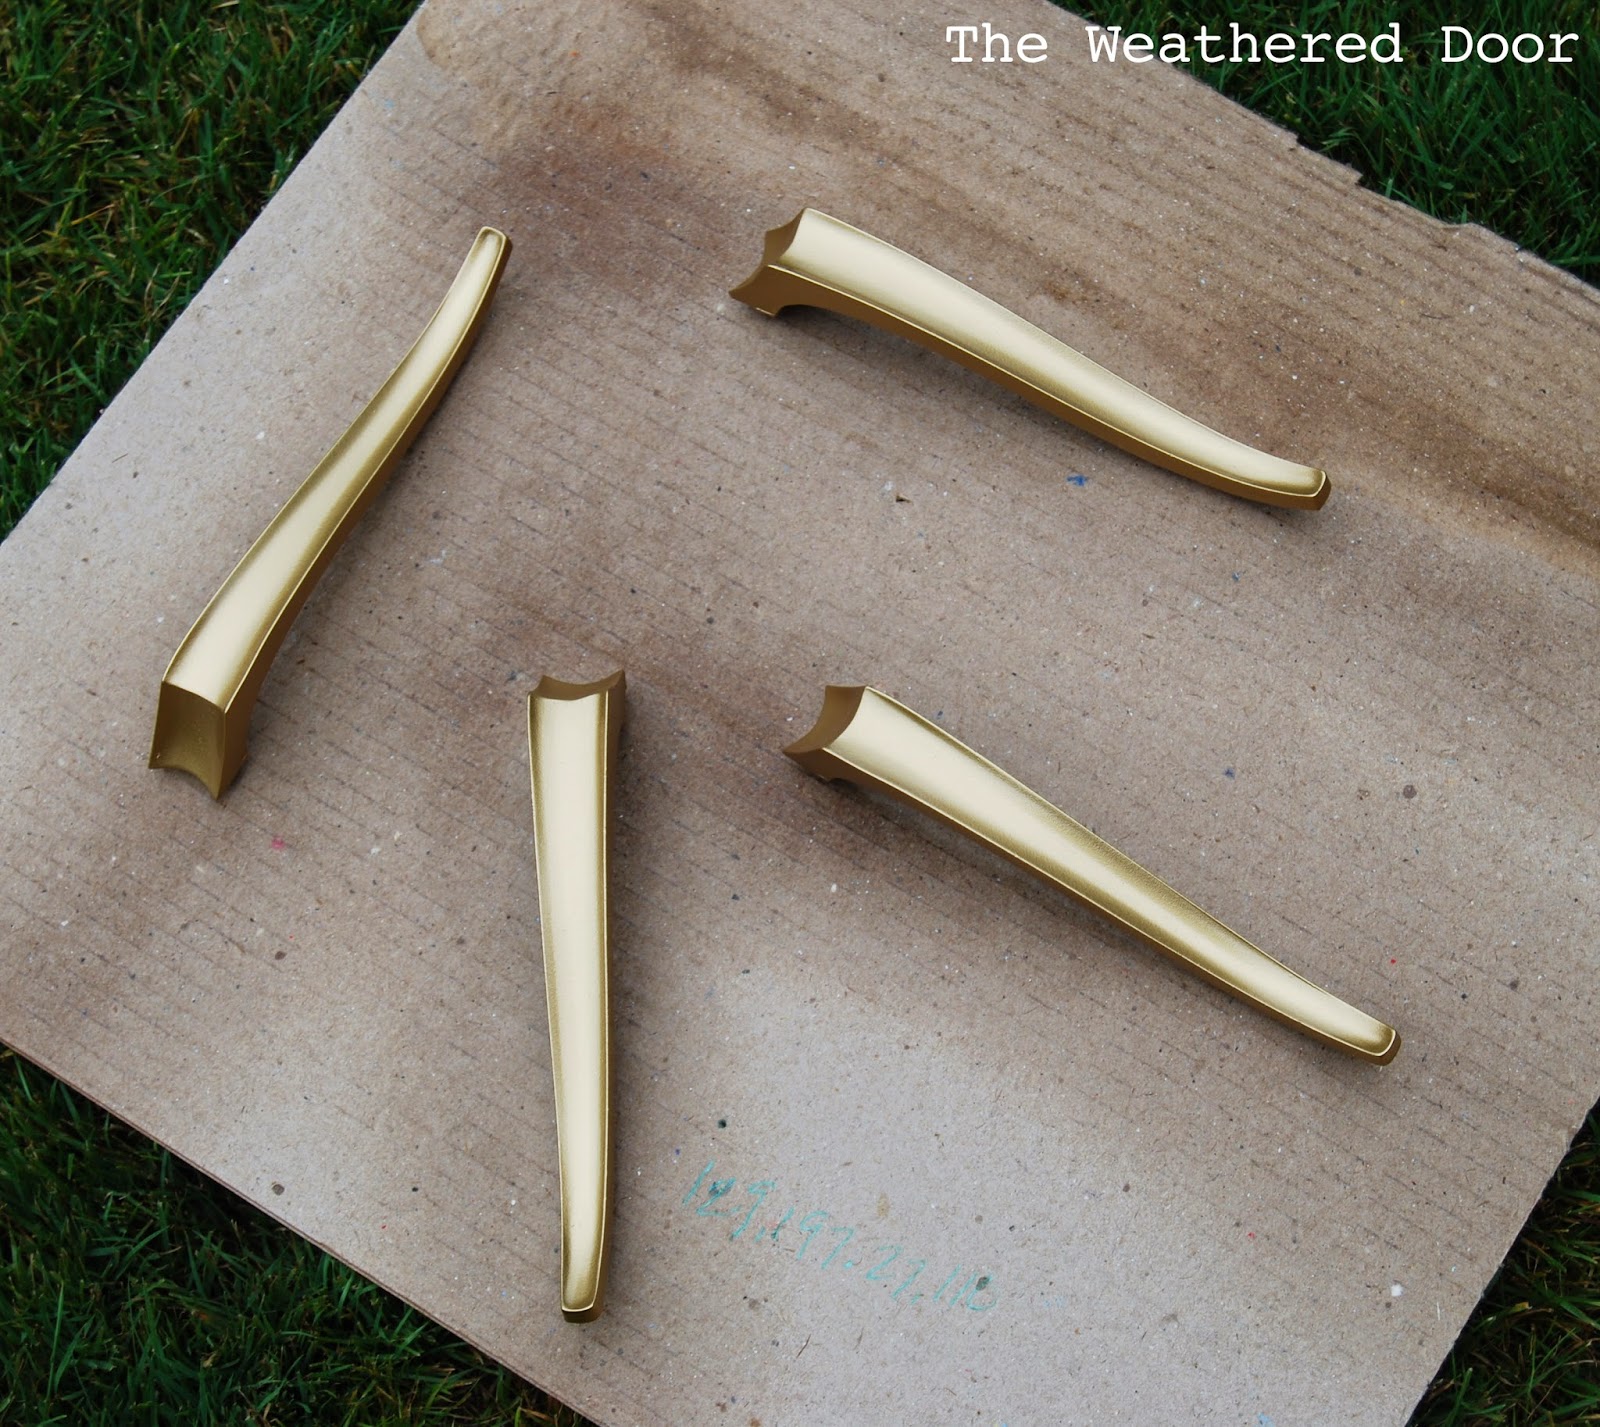
I let it sit for about 10-15 minutes. I also made a point to not touch the hardware, but to put it on a piece of cardboard and take it outside so that any oils from my hands weren’t getting back onto the hardware
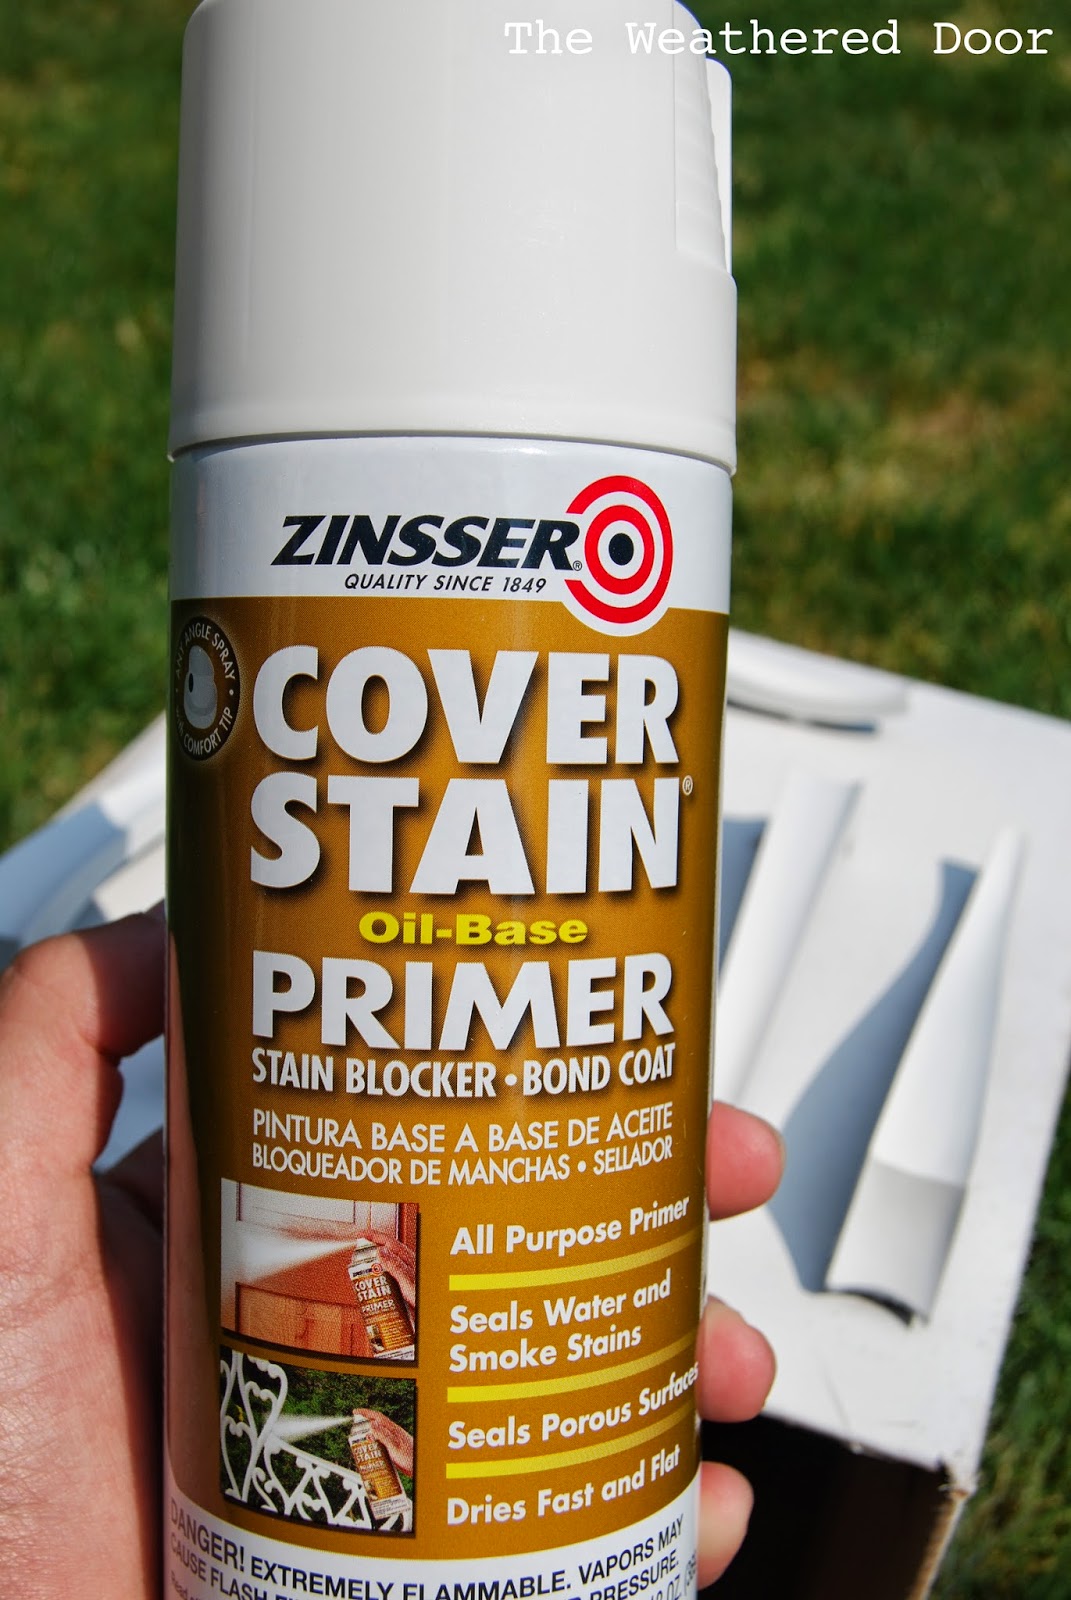
3. Prime the hardware with an oil based primer.
There are a few different types and brand of spray primer. I highly recommend Zinsser Cover Stain in a spray can. It’s an oil based primer and on the label it says it acts a bond coat. This step is very important to ensure a lasting finish that actually sticks to the hardware. Do thin coats to prevent drips. I waited a minute or two before spraying again so the primer would begin drying. Just make sure all areas of the hardware are covered with a good coat of primer.

Once the primer is dry you may want to use 0000 steel wool to very lightly go over the primer coat and make sure it’s smooth (I primed on a piece of cardboard and some of the cardboard debris was sprayed into the finish. The steel wool smoothed it right out).
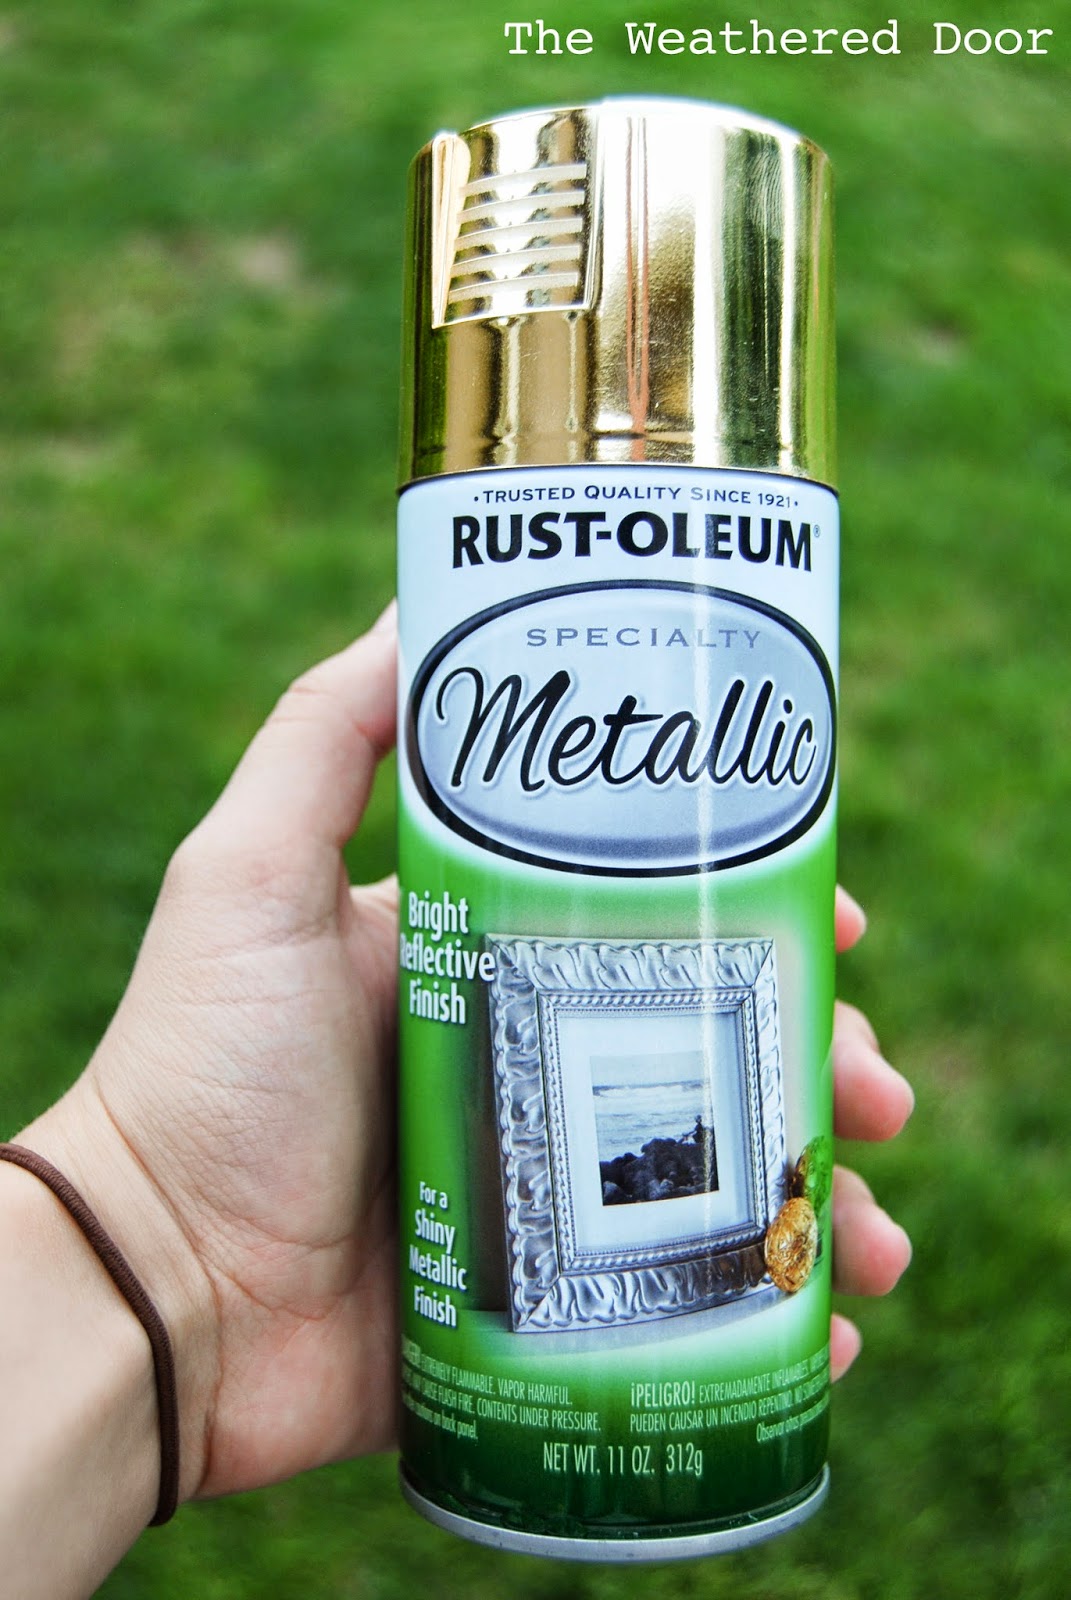
4. Spray on your paint color
For my hardware I just wanted a true gold, so I used Rustoleum’s Metallic Gold. Again, thin coats are key. I did about 2-3 coats and made sure to spray at all angles for full coverage and a smooth finish.
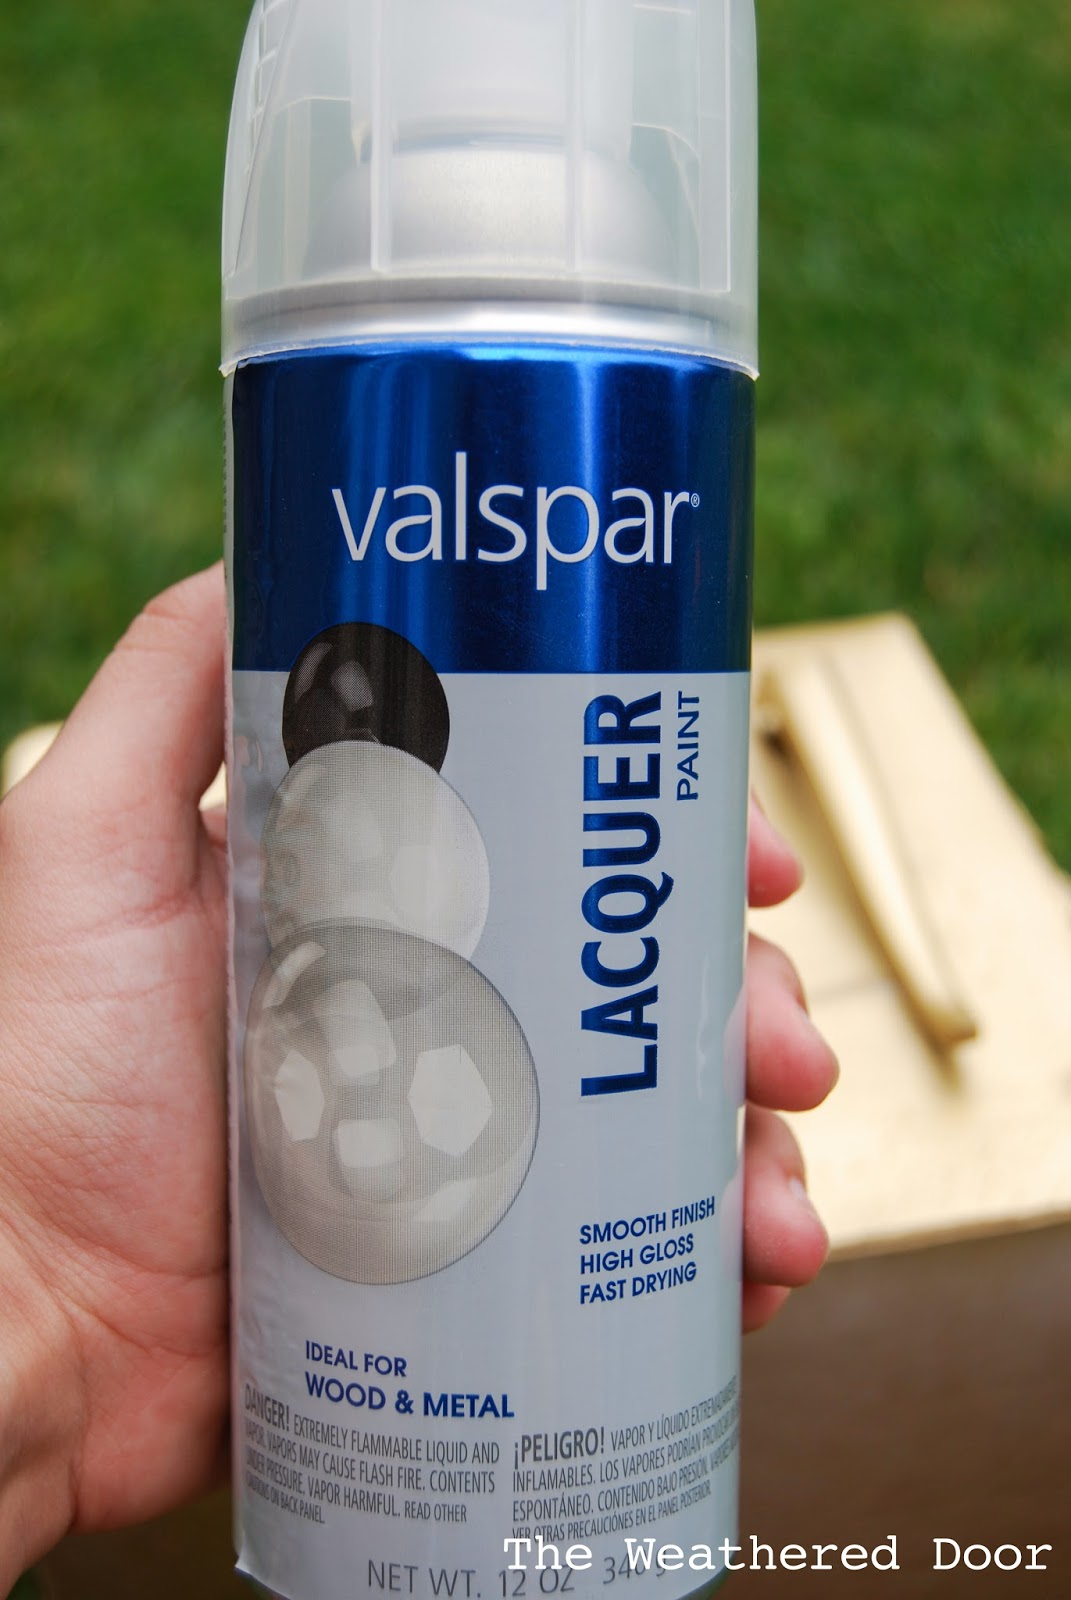
5. Seal the hardware with lacquer or another clear sealer.
After you cleaned, primed and painted the hardware it’s best to seal it. It will help the finish last longer and hold up to more wear. The paint I used said not to use a topcoat on it, but I made sure to test it out first to make sure it didn’t affect the gold color or finish. I decided to use a lacquer becasue of it’s shine and durability. I’ve also had problems with other sealers I’ve used in the past giving an uneven finish. I highly recommend the Valspar lacquer and I loved that it’s fast drying.
6. Let everything cure, then re-attach the hardware, and you’re done!
I know a lot of people just clean and then spray paint hardware, but actually taking the time to prime and seal it will really make a difference in how the paint wears and the finish holds up. Hopefully you found this useful, and now you can update some hardware with some paint!
Great tips for a long-lasting finish!
This is so good to know as I am planning on spray painting some hardware soon!! I would of just dusted them off and painted them!
Great post!! Will definitely have to remember this!
Thanks!
Stephanie
I soooo needed this post about a week ago! I even have all of the supplies. I will definitely keep this in mind for the future! Thanks for all of the details 🙂
Agreed 100%…here is a little tip that helps. First, paint the underside of the hardware…let it dry well. Put the screws back in the hardware, then stick the screws into styrofoam…I keep old packing blocks and cooler lids just for this purpose…keeps the hardware upright and allows it to dry well! If the hardware has a "loop" on it that can not be easily removed to paint, just take a sewing straight pin or trim nail, stick it in the styrofoam and then prop the loop on it…that way the "loop" isn't touching the hardware anywhere.
Thanks for the tip. I have been spray painting all of my old hardware and I do all of the above steps but the only set back I ever have is not being able to make the piece stand up off of the cardboard. I will definitely be using your idea.
What fantastic tips to paint hardware. We'll be painting all of ours when we paint our cabinets and would love to do it correctly so it will last. We'll be doing the oil rubbed bronze on our hardware. Guess I was supposed to wait to see these tips. Certainly worth buying extra supplies to make it be good job, not just to get it done. Thanks for sharing this. Pinning. Happy weekend
So glad I pinned this. I am hoping to paint front door hardware in order to avoid redrilling door locks (if using different brand door lock). More steps but well worth the work. Thank you.
so how did it hold up? Just curious.
I have spent three days doing this (a different way) and it keeps scratching off. Looks like I’m about to switch up my primer and buy some laquor. I am using the same Rustoleum paint.
Did the laquor work? I’m having the same problem with the paint scratching off the hardware.
It worked for me. I think it could vary with use and what you are painting.
Can you buy these products in Canada? Where?
Darn I tried his this afternoon to change uo the house a little bit and mine is scratching off. I’m going to leave it out to dry longer? Maybe an hour wasn’t enough!
Or I may be buying more hardware ?
Spray paint, particularly oil spray paint, can take up to a week to thoroughly dry. When you think it is dry, try to scratch it with you fingernail. If that leaves a dent, it is not dry.
Awesome, thank you soooo much. So, no sanding needed?