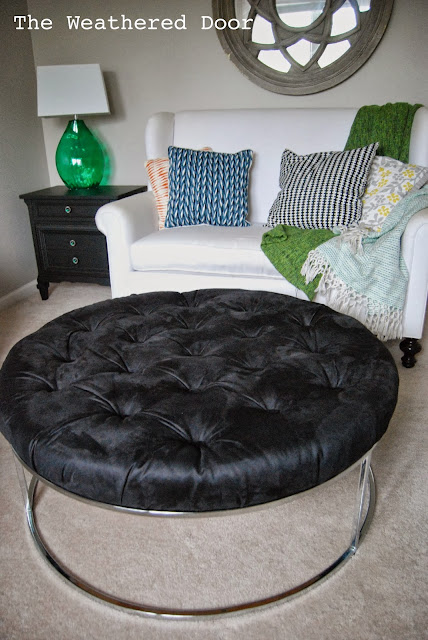
I love this tufted ottoman I get to share with you today, I think it is such a gorgeous makeover even though it took a ton of work!
I originally found the base at a thrift store type shop. It had a black formica top, but I knew right away it would make the perfect tufted ottoman.
After sitting the the garage for over a year (you can see all the dust 😉 ), it was finally time to get this project completed. The original top was too thick to add foam to, so when we got a new roof on the house in September I had my dad snatch a couple piece of the extra plywood to make a base for the new top. We ended up sticking two together to make it extra sturdy and I used a jigsaw to cut out the circle. My dad and I glued the two piece of wood together, then I had some help measuring and marking tufts, I drilled out the holes for the tufting, made buttons, cut out the foam and adhered the foam to the plywood. That was all the prep work that happen before the actually upholstering and tufting. In my experience tufting is a two person job, so I recruited my mom to help me Sunday evening.
It took a few hours, but we got it done – and this is one of the few times something came out the way I imagined it! That’s always exciting for me 🙂 I love the black, microfiber top – it has a velvet look to it which makes it so luxurious looking, and paired with the modern chrome base – ahh! I just love it! It’s the perfect piece for a mid century style space. Here it is in all its tufted goodness–


It turned out wonderful, what a wonderful find that was in the first place and then you sure made it useful and new and chic, love it
Looks fantastic! Good job!
You have a great eye! Nicely done!
I absolutely love how this turned out. Awesome idea! I'd love for you to link up to The DIY'ers link party! http://homecomingmn.blogspot.com/2013/10/the-diyers-35.html