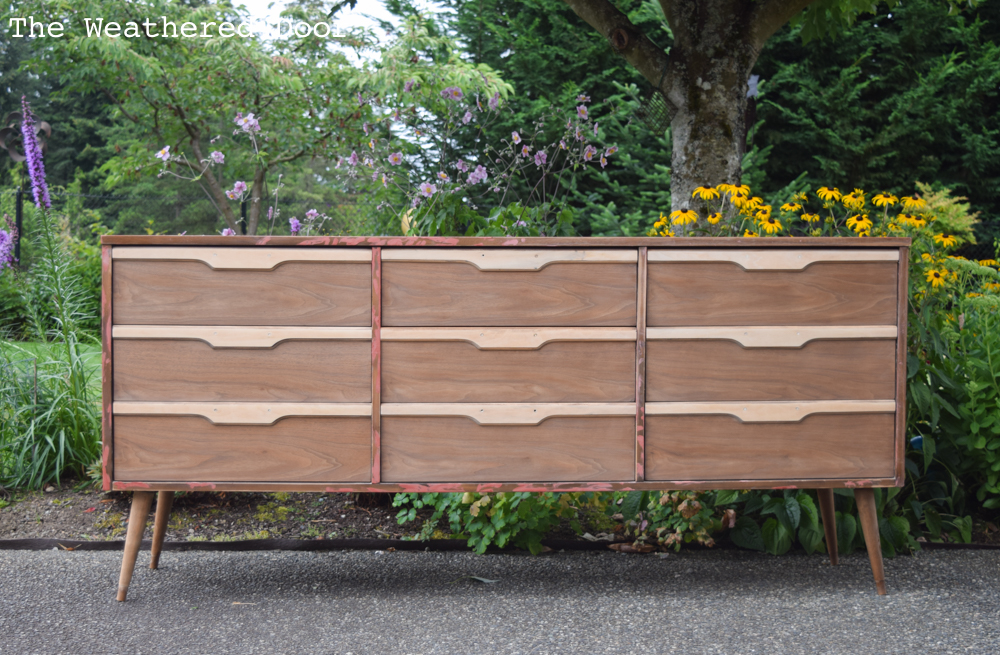
This credenza went through many iterations before it ended up in its final state. From all gray, to white & walnut, and then black and natural wood… it seems like every option was considered. The one thing that was constant the whole time was adding legs.
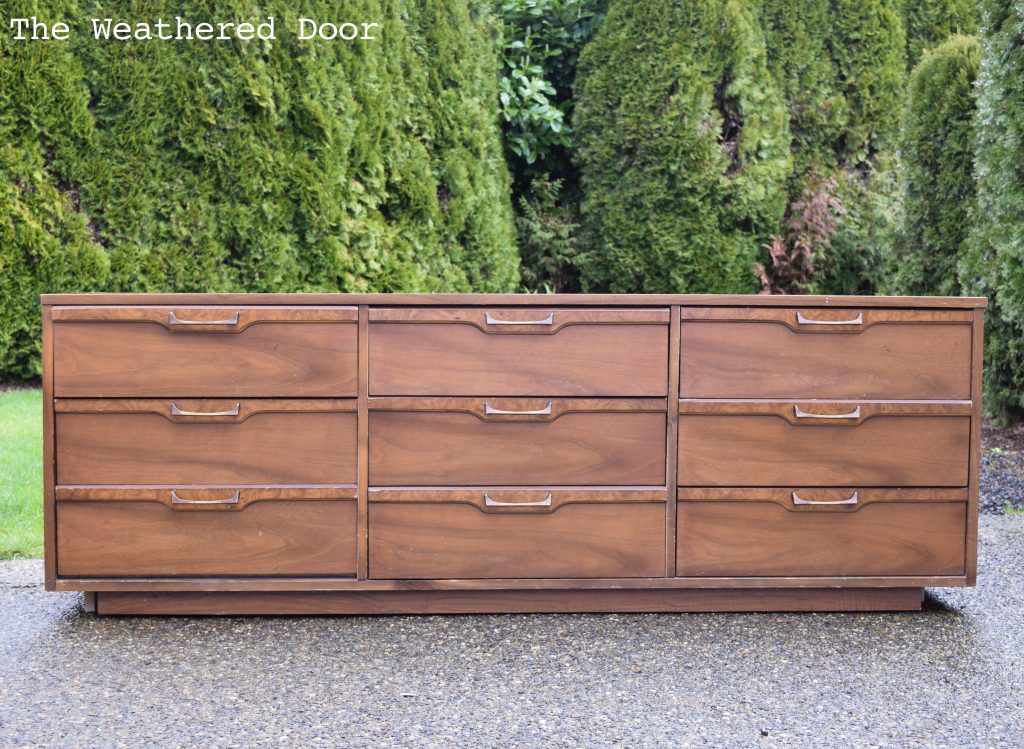
I posted the Before & After reveal a couple of weeks ago. That post details the whole process of refinishing the piece if you want to read about it. For now, I’m talking about how to add legs to furniture and the impact it can have.
What you need
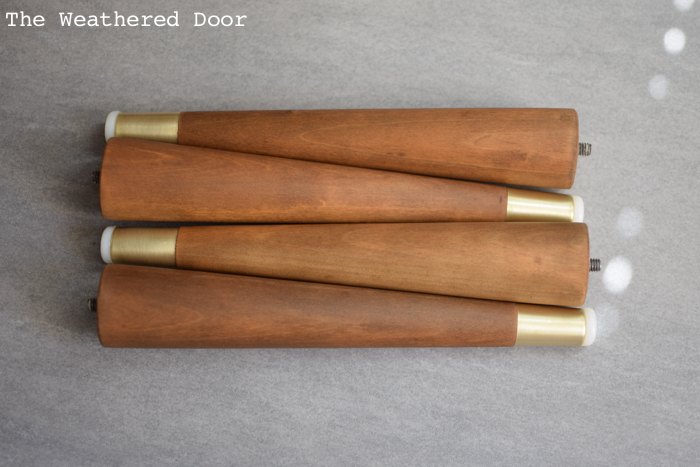
First, you need legs. You can purchase new legs at Lowes, Home Depot or even on Amazon. For my project I used some vintage mid century legs with brass caps. I purchased a small ottoman at goodwill for $12 and took the legs off of that. Second, you need mounting brackets that attach to the furniture and that the legs will screw into. There are two options for this – regular brackets, or angled brackets. Obviously angled brackets allow the legs to be mounted at a slight angle.
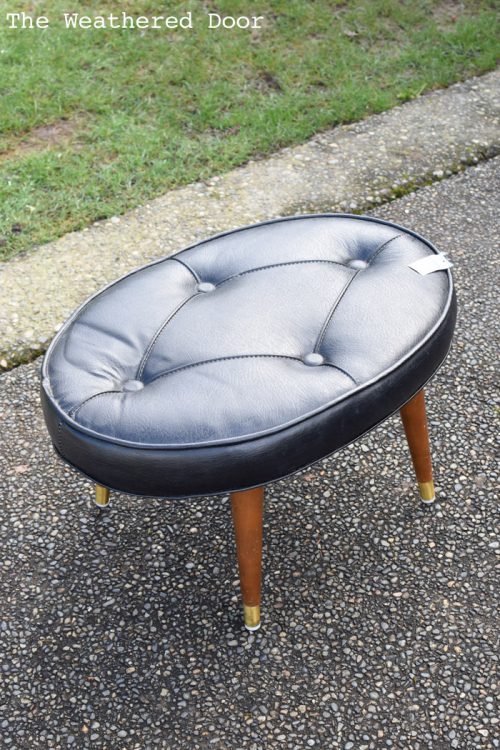
I used the mounting brackets that came on the ottoman I purchased. I like that they were angled brackets since it fit the mid century style of the dresser.
How to Add the Legs
Depending on the piece of furniture you are working with the legs or base currently on it will need to be removed. For the dresser I have the base needed to be removed. It was held on with a few screws which made it quite easy. I have added legs to other pieces where the base was nailed on. With those pieces I just used a hammer to pry the base off.
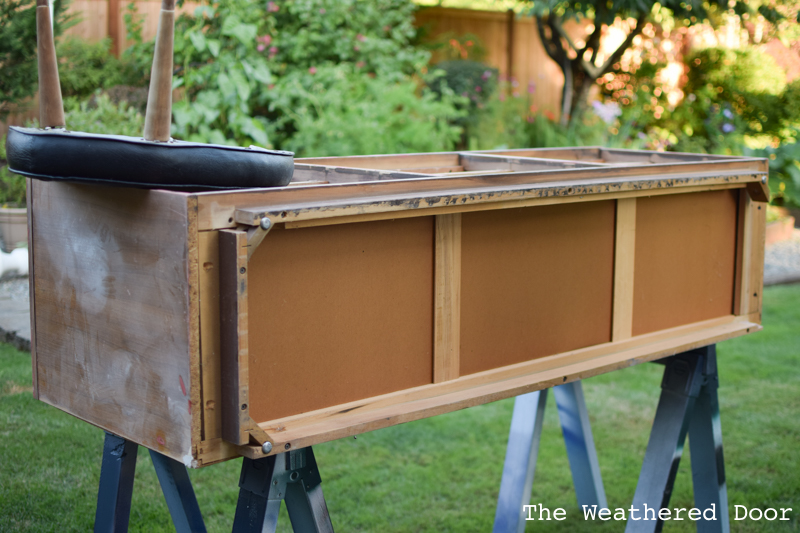
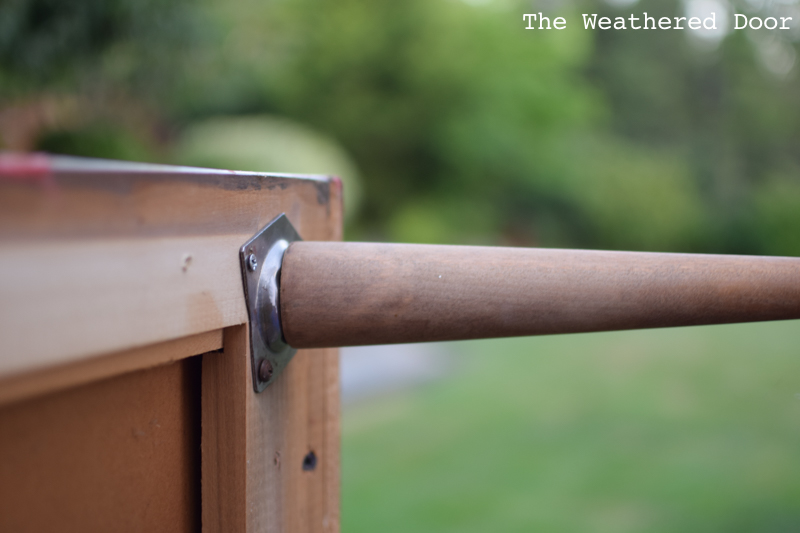
Once the base is removed assess the construction of the piece. Figure out the placement of the legs and determine if extra support needs to be added in order to attach the mounting brackets. Don’t think a think a thin piece of plywood is going to be sufficient to mount the legs to. The piece will not hold up. I attached the legs at the corners of the dresser where there was a solid piece of wood that was reinforced on the interior of the dresser.
With the help of my dad I measured out the placement, market the holes, and then pre-drilled were the screws would go. Make sure your screws are the correct length. You don’t want them poking up through the dresser. We then screwed the brackets on all four corners and attached the legs to confirm correct placement.
Refinishing the Piece
In my case I was also updating this piece by painting and refinishing the wood. I also stripped the legs and added a light walnut finish to have then match the color of the drawers. This video shows how to strip furniture.
Once the piece and the legs were done being refinished I simply attached the legs to the brackets and now have a dresser that is completely transformed!

Looks great!!!
Love it!
Thank you!
Nice transformation!!!!
Thanks for the tutorial.
Love the transformation – what a beautiful piece! I do love the ottoman too… what did you end up doing with that piece?
I have a similar dresser that needs legs–just curious, how tall are your legs?
Thanks!
That was genius looking at the end result!!
What is the length of the legs you added?